2.2.3.2 Definition for models
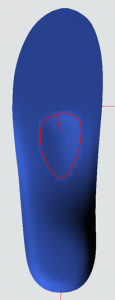
To define the degrees of hardness for your individual models on the insert, switch to the view from above [O]. With the right mouse button the individual models can then be selected (Figure 6).

Figure 7 Selecting a model using the right mouse button
About the selection of Show body the degree of hardness for the model is adopted up to the bottom of the insert (Figure 7). If Show body not is selected, the degree of hardness is again only changed for the boxes that touch the top of the insole (Figure 8).
NOTE: Is Show body not is selected, it may be that the area for the respective degree of hardness is very low in height and therefore does not become soft during printing. We therefore recommend that you first define the hardness of the models over the entire height of the insole and then define the underside of the insole harder again afterwards. This ensures a soft upper side.

Figure 8 Pad selected as model -> Show body selected -> Degree of hardness is defined up to the bottom of the insole.

Figure 9 Pad selected as model -> Show body not selected -> Degree of hardness only defined for the boxes of the model that touch the top of the insole.
To make the transitions between hard and soft areas even smoother, you have the option of enlarging the models using the button [+1] and to reduce [-1]. This allows different transitions to be defined for the models. For models that are to be soft on the inlay, we recommend first enlarging the model twice and defining a degree of hardness of 35, for example. Then reduce the model using [-1] and define a hardness of 30. Then bring the model over [-1] to the original size and define a hardness of 20. This gives you a grading that takes place over a larger area (Figure 9). If this is not done, the degree of hardness is graded within a box. This procedure can be used to define the degree of hardness for each model accordingly. It can also be helpful to view the selected area from the side views [I] and [A] (e.g. Figure 7). This makes it easier to understand the effective range.

Figure 10 Degrees of hardness graded using the [+1] and [-1] buttons