2.3.1 Function box
The various views and different display options can be selected using the function box.
![]()
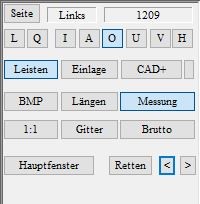
With [L] [Q] you can view both bars side by side or on top of each other in landscape and portrait format. Press [I]- Inside, [A]- Outside, [O]- Top, [U]- Bottom, [V]- Front, [H]- Rear to switch views.
Click on the [Mouldings] button to activate or deactivate GP OptiCAD Click on the [Insert] button to activate or deactivate InsoleCAD. Click on the [CAD+] button to activate the CAD+ module, where you can create a gross moulding in GP OptiCAD.
If you have selected a measurement as the basis for the moulding, you can display the corresponding plantar image by clicking on [BMP]. Click on the [Lengths] button to display the dimensions of the moulding (length and width). With CTRL on the [Measurement] button you can select a measurement and with a single click on this button you can activate or deactivate the measurements. With a calibrated screen, you can display the moulding in its original size (scale 1:1) by clicking on the [1:1] button. Click on the [Grid] button to display the bar as a grid structure. Hold down the CTRL key and click on this button to place this structure on the moulding.
With GP CAD+ activated, you can create a gross bar by clicking on the [Gross] button and then holding down the CTRL key and clicking on the [<<Library] button.
Individual work steps can also be saved using [Save]. The [Main window] button always takes you back to the standard view of the toolbox.
