GP Insole CAD
You can also have your own insoles digitised and use them in your InsoleCad library:
- Please print the Declaration of consent from.
- fill them in completely
- Send us the signed Declaration of consent and your insole to be digitised in 3 sizes (size 35, 40, 45), or send us the measurements as described in the declaration of consent
- Address: GeBioM mbH
For the attention of Mr Petker
Wilhelm-Schickard-Str. 12
48149 Münster
Error description
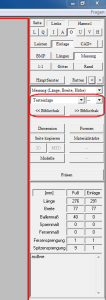
An image created with the GP foot measurement module is not displayed in InsoleCAD. You have already selected a measurement in the GP CAD module (CTRL + Measurement) and the button for BMP is activated.
Cause of error
The problem can occur if the measurement in the GP foot measurement module has not been processed correctly. Carry out the following steps:
- Select the GP foot measurement module via "Trade fairs“ -> „GP foot measurement“
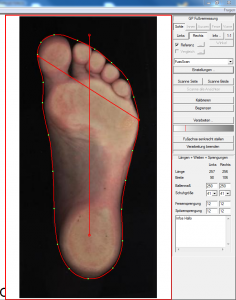
- Edit the contour line manually by placing the green dots on the edge of the measurement (also carry out this step if the dots are already well positioned, move at least some of the dots). You can move the points by clicking on them with CTRL + left mouse button.
- Proceed in the same way with the foot axis. You can move it by clicking on the end points with the left mouse button. Then select "Set foot axis vertical".
- The GP CAD measurement should then be displayed.
- If this has not helped, select "Calibrate" and start the process again from the beginning.
Error description
There are inserts in the library. The inserts can be loaded from the library by name. If you open the library with the "<< Library" button, only the name of the insert is displayed, but no image.
Cause of error
The GP Manager has problems displaying the library when Windows is running with the Aero interface.
Troubleshooting
Select a display without Aero for Windows. Click with the right mouse button to an empty space on your desktop. In the following menu, select "Customise". Select a design without an aero surface.
Error description
It is with one Grading table not possible these to utilise. With other Grading tables steps the problem not on.
Cause of error
Very probably contains the File name the Grading table invalid Sign. To the Example Space at the false Digit or special character.
Troubleshooting
Create a new size table. Name the size table only with Letters, Figures and _. The grading table should then be accepted by the GP Manager.
Error description
You have your own inserts that you use frequently and would like to find them more easily or process them more often.
Error solution
It makes sense to organise the inserts in separate libraries so that you can quickly load frequently used inserts as templates. To do this, start the GP Manager and first define a customer via "Project“ -> “Determine". You now have the option of selecting an existing insole for the customer or modelling a new insole with the help of a measurement.
Then select the GP CAD module via "Analysis“ -> „GP CAD". On the right are the two buttons for managing your libraries.
- Load model from library

- Add model to library

Edit your insert until you want to add it to the library, click on: ">>Library"
You can manage your libraries in the following dialogue. You now have several options on how to proceed. You can Create a new library or you can use the Adding an insert to an existing library.
Error description
You would like to insert a measurement in a CAD module. If you are in a CAD module, there is a "Measurement" button in the toolbar at the top left, clicking on the button does nothing, or only the blue line in CAD is shown/hidden.
Troubleshooting
- Hold down the CTRL key and click with the left mouse button on the "Trade fairs" Button
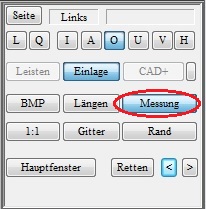
- A dialogue appears in which you can select a measurement. Make sure you select a measurement that was taken with the correct measuring device (2D Scan, 3D Scan, KinectScan).
- The CAD measurement should then be used.
- If the desired measurement is not displayed in GP Manager version 6, make sure that "All data records" is selected.
Error description
The insole/lasts are displayed in white in InsoleCAD/OptiCAD. Or you would like to adjust the colours in the InsoleCAD/OptiCAD display.
Cause of error
The settings have been changed or do not meet your requirements.
Troubleshooting
If you are using version 6.5:
- Start the GP Manager
- Select any customer
- Start the GP CAD module via the menu ("Analysis" -> „GP CAD")
- Then select "Extras“ -> „Parameter ...„
- You can change the colour values here. If you select "Standard" the default value is restored
- In order for the values to be permanently adopted, you must click on the "-> INI" use!
- If this does not help either, select "Extended“ -> „Standard“

Error description
After updating the operating system to Windows 10, an image is no longer displayed in CAD.
Causes of errors
Windows 10 requires the latest versions of DirectX and the graphics card drivers to function.
Troubleshooting
- Install the latest version of DirectX
- You can download the DirectX installation routine in the subfolder .\GpTools\Directx find. The setup file is called dxwebsetup.exe (How to find your GP Manager installation). You need Internet access for the installation to work.
- Run from the .\GpTools\Directx the individual Visual Studio Redistributable packages again (Vcredist_2008_SP1, Vcredist_2010, Vcredist_2013).
- Update the driver for your graphics card
Error description
Orders that have already been milled are not or no longer displayed.
Causes of errors
Either the list has not been updated or there are too many completed jobs in the subfolder .\GpData\Fraese\Files\Done
Troubleshooting
- Firstly, update the list. To do this, start the GP Manager.
- GP Manager V7
- GP Manager V6
- Open "Analysis“ -> „GP milling machine„
- Select "Show completed orders„
- Click on "Update list"
- The completed orders should then appear in the list.
- If this has not helped, it may be that you have not deleted completed orders over a longer period of time. If the list becomes too long, the GP Manager can no longer update the list.
- Exit the GP Manager
- Open the path to your GP Manager.
- Go to the folder .\GpData\Fraese\Files\Done
- Delete all or some of the files stored there or move them.
- Restart the GP Manager and display the list again.
You should delete completed orders at regular intervals. You can do this either directly in GP InsoleFraese by selecting the jobs you want to delete and choosing "Remove jobs". Or by deleting the files from the .\GpData\Fraese\Documents\Delete completed.

Error description
After clicking on 1:1, the model is not displayed in the correct size on the monitor.
Causes of errors
The GP Manager is not calibrated for the monitor.
Troubleshooting
Version 7
- Start the GP Manager.
- Select "GP Admin“
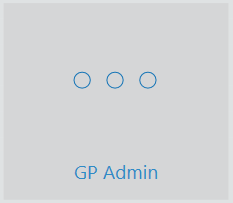
- Select "Calibrate screen“
- Drag the window at one corner so that it is displayed 10 x 10 cm on the monitor

Note:
If you use several monitor models, a 1:1 display is only guaranteed on the monitor on which the calibration was carried out. - Click on "Apply calibration„
Version 6.5
If you would like to copy an existing insole for a customer because they are to receive the same insole again after a certain time (perhaps with a slightly different pad thickness or similar) or they have a second pair of shoes, this is done as follows:
Open the insert to be copied in the GP CAD module.
- Specify a customer
- Open the GP CAD module via „Analysis“ -> „GP CAD“
 Or double-click on the inserts you want to copy in the project view.
 - You should now see the inserts you have created.

- Click on "Save".

- Click on "Page".

- Click on "Save" again.
- Create a new data record using the buttons at the bottom left of the GP Manager. Click on the button that looks like a leaf with an asterisk.

- An empty data record will then be displayed. You can now copy the deposits saved above into this record by clicking on the „<" button.

- Click on "Page".

- Click again on the „<" button. The deposits are now copied to the new data record. You can use the +/- buttons at the bottom left to switch between the customer's data records.
