Cleaning the print head is an important process that contributes to the quality of the printed objects. It reduces the risk of clogging and ensures even extrusion of the filament.

Cleaning the nozzle from the outside

We recommend that the outer tip of the print head (the nozzle) daily with the cleaning tool included in the accessory box.

Allow the print head to cool down first. Scrape the nozzle with the cleaning tool until the tip is free of filament residue. Make sure that you do not touch the inductive sensor (blue dot) behind the nozzle when cleaning it.

Cleaning the inside of the nozzle

We recommend that the inside of the nozzle twice a week or every time a new filament spool is inserted. Only use approved cleaning filament and the "cold pull" method described below.

  1. Remove the inserted filament from the nozzle (using the filament change procedure)
  2. Insert the cleaning filament into the nozzle.
  3. Extrude 3-4 cm of filament. In some cases, the clogged material will come out.
  4. Set the temperature so that it drops from the standard setting of 265 °C to 125 °C.
  5. Extrude the cleaning filament while the temperature drops.
  6. Extrusion stops at around 200 °C because the filament can no longer melt.
  7. When the temperature has reached 130-125 °C, pull the cleaning filament straight up out of the hotend until it emerges from the nozzle.
  8. This strong pull removes impurities and material from the nozzle.
  9. Look through the nozzle hole, you should be able to see all the way through.

If this is not the case, repeat steps 2 to 9 until the cleaning filament can be removed free of impurities and you can see through the nozzle opening.

  • The outside of the print head (nozzle) should be cleaned daily. Use a plastic or wooden tool to avoid damaging the brass nozzle tip in the area of the filament outlet hole. Scrape off the filament until the tip is free of filament residue.
  • The inside of the print head should be cleaned regularly to ensure even extrusion of the filament. Clean the inside of the nozzle as often as filament is changed. Only use approved cleaning filament and its procedure.
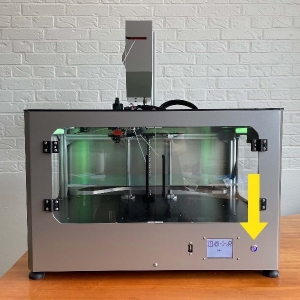
Each print leaves some oil residue from the printed material, which over time will cause printed objects to adhere less to the surface. It is recommended to clean the print surface thoroughly with isopropyl alcohol before each print to remove any oil residue (see chapter 10).

To ensure that the printer continues to print as expected, regular cleaning is recommended. Both the print bed and the print head must be cleaned.

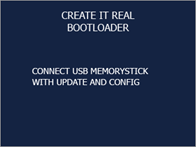
A USB stick is required to update the firmware. Transfer the update files provided by GeBioM to the root folder of a USB stick, disconnect the USB stick and then carry out the following steps:

1  

Switch on the printer.


2


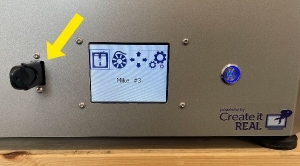
Connect the USB stick to the printer.
Important:  The USB flash drive must be a FAT32 file format.


3


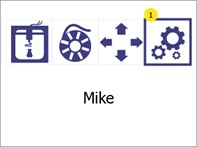
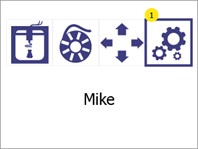
Open the menu Settings (1).


4


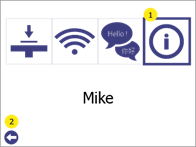
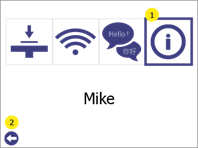
Go to the menu Printer information and firmware update (1).

Press the Back button (2) to return to the main menu.


5


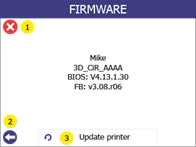
Select Update printer (3).

Press the Back button (2) or Cancel (1) to return to the main menu


6


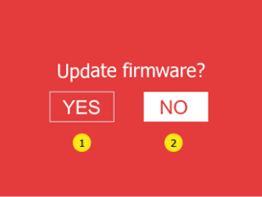
Click "Yes" (1) twice to confirm this.

Press "No" (2) to return to the main menu.


7


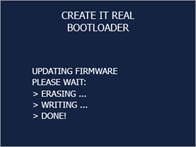
Wait until the update is installed.


8


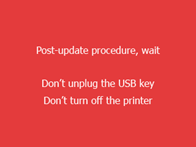
Allow the printer to start, without the USB stick from the printer to remove.


9


Wait until a green
screen with confirmation of the successful update or an ok button is displayed. Some update procedures can take up to one minute.

System information about the printer can be found in the information menu. This is usually used for customer support.


1

Open the menu Settingsby pressing the settings button (1).


2

Open the menu Printer information and firmware updateby pressing the information button (1).

Press the Back button (2) to return to the main menu.


3

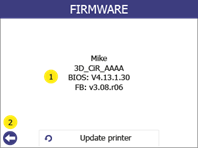
The following can be seen on the information screen (1):

- The printer model

- The unique name of the printer.

- BIOS version of the printer.

- Printer firmware version.

Press the Back button (2) to return to the Settings to return.


If required, it is possible to control the movement and heating of the printer manually.

1  

Open the menu Manual controlby pressing the manual control button (1).


2


Use the arrows (1) to move the print head in the working area.


Press the home button in the centre (1) to move all axes to their "home" position (zero).


Move the print bed up and down using the Z-axis arrows (2).


Extrude or retract the filament using the print head control arrows (3). (Note that these buttons are disabled when the print head temperature (5) is lower than the target temperature (6))

Start manual heating with the

temperatures (5 and 6). When manual heating is started (the printer maintains or reaches a certain temperature), the button
a red border. If no manual heating is activated, the border is green.


3


Set the target temperature by pressing the down arrow (1) and the up arrow (4).


To confirm the target temperature and start heating, press the confirmation button (7).


The status of the heating controller is shown on the display (6), which shows IDLE when not heating and HEATING when heating.

In addition, the lighting in the printer is white when the heating control is switched off and purple when the control is switched on.

To stop heating, either go back to the main menu or reduce the target temperature (3) below 30 °C. oC ("-" is displayed) and click on Confirm (7)


Press the Back button (5) to return to the Manual control to return.

Press the Back button (5) again to go to the main menu.

The pause menu can be accessed at any time during printing.


1

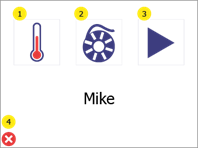
During printing, access the menu Break by pressing the pause button (1).


2


It is possible from the pause menu:

- Adjust the temperature (1).

- To change the filament (2), see chapter 7.

- Continue printing (3).

To cancel the printing process, press the cancel button (4).

Printing via WLAN is started directly from the GP Inlay Print module in the GP Manager and the file is automatically transferred to the printer's internal memory.


1


Open the GP Inlay Print module and select the relevant job from the job list. Select a page. Check whether a printer in the printer list on the left-hand side is idle (IDLE). Make sure that the printer is prepared for printing. See chapter 10.

Start printing using the button Start printing via WiFi.

The printer indicates that printing is being started via Wi-Fi.


2


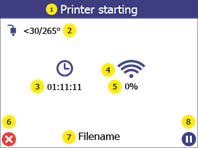
The print preview screen shows the status of the print process during printing:

(1) indicates whether the printer is currently heating or printing.

(2) displays the current and target temperature.

(3) shows the remaining time of the print job to be completed.

(4) indicates whether printing has been started via WiFi.

(5) shows the progress of printing in %.

(7) displays the file name of the object to be printed.


To pause printing, press the pause button (8). Further information can be found in section 11.3.


To cancel the printing process, press the cancel button (6).


If the service allows it, the printer can print directly from a USB flash drive.


1

Open the menu Print USBby pressing the Print button (1).


2

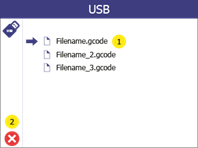
A list of all available print files is displayed (1). The arrow indicates which file is currently selected. To select a file, press it (if not already selected) and then press it again to confirm the selection.

Press the Back button (2) to return to the main menu.


3

On the print preview screen, it is possible to display the file name of the selected file (1).

If a temperature other than the temperature set in the print file is required, it can be changed by pressing the temperature (3).

To start printing, press the "Next" button (4).


Press the Back button (2) to go back one step.


4


The print preview screen shows the status of the print process during printing:

(1) shows the status of the printer.

(2) shows the current and target temperature.

(3) shows the remaining time of the print job to be completed.

(4) indicates whether the printer is reading the print file from USB. If this is the case, do not remove the USB flash drive from the printer as this will end the print job.

(5) shows the progress of printing in %.

(7) displays the file name of the object to be printed.

To pause printing, press the pause button (8). For more information, see section 11.3.


To cancel the printing process, press the cancel button (6).