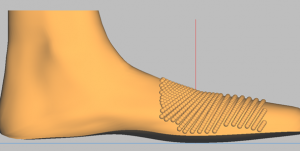
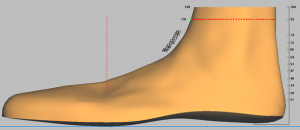
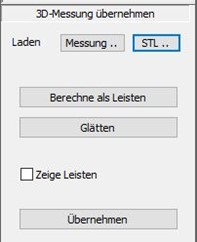
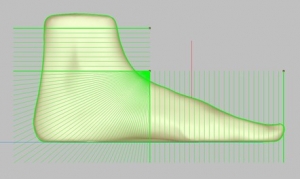
1. open GP FussMess module & start measurement
On the start page of the GP Manager, click on the icon 
to start the module.
Now select the scanner you want to use for the measurement from the drop-down menu. The LaserScan F2 was used for this example. Clicking on [Scan page] (or [Scan both]) takes you to a submenu where you can select which page you want to scan. Start the measurement by pressing the CTRL key (or the foot pedal if available).

You can also adjust the dimensions in this module if required.
Click on the 
button to return to the GP Manager start page.
2. open GP CAD module & create new strips
On the start page of the GP Manager, click on the icon 
start the module.
To create a new construction, please click on the button in the top right corner  on. A window with your previous designs will then open. Click on the [New] button at the bottom of the window. Then activate the [Bars] button in the function box:
3. call up measurement and select library strips
To call up a measurement, hold down the CTRL key and click on the Measurement button
 .
.
A dialogue will now open in which you can select and load the desired measurement. The measurement is now displayed as a blue outline.
You can select a library bar by clicking on the [<<Library] button or via the drop-down menu.

The power is then displayed with the outline of the measurement.
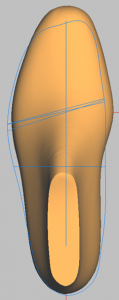
4. modelling library strips
All functions required for 3D modelling are located behind the buttons in the toolbox.
The exact procedure depends on which measurement you start with.
There are usually three different options for modelling: Total, Partial and Special. Changes in the modes are always carried out with Ctrl + left mouse button + mouse movement.
Depending on the mode, the position of the mouse click determines which part is changed.
4.1 Dimensions
Note: In the "Dimensions" design area, you can edit and view your moulding in the interior, exterior, top, bottom, front and rear views. If you would like to rotate the moulding in all axes, please switch to the "Main window".
Note: When working with the dimensions, remember to use the "Save" button after each successful step.
4.2 Position
If the "Position" option has been selected, you can add the strips with :
Ctrl + left mouse button + move mouse horizontally/vertically
Ctrl + Shift + left mouse button + mouse movement Rotate forefoot/rearfoot area
Switch through the standard views to get an exact idea of the spatial position of the moulding. Make sure that the moulding in views I, A, V and H is not below the zero line. The zero line is the horizontal line in one of the two side views (inside or outside). You can also change the position of your moulding in all other views.
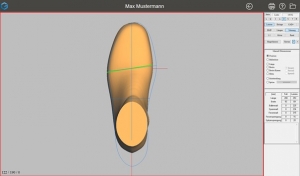
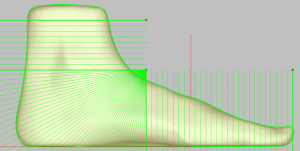
After positioning, the ball line of the last (green line) should be positioned so that it intersects the point at which the ball line of the measurement intersects the foot axis. This applies to a construction with a library last.
The moulding should be positioned so that it lies within the measurement.
4.3 Bale line
Position the bale line with Ctrl + left mouse button + mouse movement so that it is parallel to the bale line of the measurement. If necessary, use "Position" again to align the bale lines.
Attention: Please note that a very strong displacement of the bunion line can lead to strong changes in the entire last.
4.4 Length
If the Length option is selected, you can adjust the length of the moulding to the measurement. To change the length, use Ctrl + left mouse button + mouse movement. Change depending on the mode:
- Total: Length front and rear
- Partial: Length at the front or rear, depending on the position of the mouse
- Special: The length in the selected area
4.5 Width
After clicking on the "Width" radio button, you can change the width of the moulding or the moulding comb if you select "Width mouldings". The area of the change is determined by selecting one of the "Total", "Partial" or "Special" radio buttons.
- Total: The width is changed on both sides
- Partial: Depending on the position of the mouse, five areas can be changed. The respective areas are permanently defined.
- If the last in the toe area is clicked, the area from the tip of the foot to the ball of the foot is changed (right or left), with the greatest change at the height of the toes. The following key combinations are possible:
Ctrl + left mouse button Change a page
Ctrl + Shift + left mouse button Change both sides
- If the last is clicked in the area of the bunion line, the width is changed from the toe to the heel (right or left), with the greatest change occurring at the intersection of the bunion line and the edge of the measurement/ last. The following key combinations are possible:
Ctrl + left mouse button Change a page
Ctrl + Shift + left mouse button Change both sides
- If the last is clicked in the heel area, the width of the rear foot is changed on both sides.
- Especially: The width in the selected area can be adjusted.
4.6 Height
After clicking on the "Height" radio button, you can change this dimension on the moulding. The area of the change can be specified by selecting one of the "Total" or "Special" radio buttons. You can adjust the height with the combination Ctrl + left mouse button + mouse movement.
Attention: The height can only be changed in views A (outside) and I (inside).
- Total: The entire height is adjusted.
- Partial: Not available
- Special: The height is adjusted in the selected area.
4.7 Crescent position
If the "Crescent position" radio button is active, a rectangle is placed within the moulding. The moulding is deformed by rotating it at the centre of the rectangle. The rectangle is placed by pressing the left mouse button on or next to the moulding in the active workspace and selecting an area.
The rotation is performed with the combination Ctrl key + left mouse button and can be performed for the (forefoot) or (backfoot) areas. The decisive factor here is the position of the mouse pointer in relation to the defined rectangle.
4.8 Adjusting the tip
With this option, you can draw a rectangle over the forefoot. Within this rectangle, the tip of the opposite side is adopted after clicking the "Customise" button.
4.9 Axes
Selecting the axes opens a selection box:

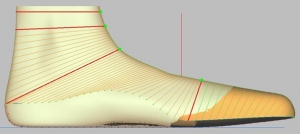
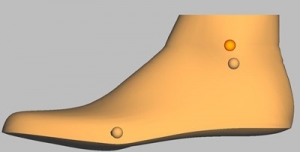
These 3 axes (bunion line, ankle axis and mechanical axis) are displayed on the bar. These axis points can be moved and adjusted by grabbing the respective end of the axis with the left mouse button and editing them in the corresponding view, which can be changed in the process.
The mechanical axis represents the axis of rotation around which dorsiflexion and plantar flexion take place.

4.10. Smoothing
Click on the "Smooth" option to open a selection box:

Use the "Global" option to smooth the entire moulding. Click on the [Execute] button in the selection box to perform normal smoothing. If you hold down the CTRL key while doing this, the smoothing is increased slightly. Pressing the SHIFT key will smooth the area strongly and pressing CTRL+SHIFT will smooth the area very strongly.
These key combinations in conjunction with the Execute button apply to all smoothing options!
Note: With the right mouse button, you can select several areas at the same time. You can also delete selected areas by selecting them again.
With the shape and surface options, you can specify exactly how and where you want to smooth your moulding.
Use the left mouse button to drag a rectangle over the area of the moulding that you want to smooth. You can set this rectangle in any bar view. The area to be smoothed is then displayed on the moulding:
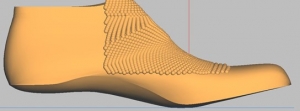
With the "Shape" option, a single unevenness is brought back to the height of the remaining moulding surface. The "Surface" option straightens several irregularities, i.e. a large uneven surface. These functions can be used both vertically and horizontally on the moulding.
The last two options "Erase" and "Fill" either remove (erase) or fill (fill) material in the selected area.
4.11. Copy page
If you select the "Copy page" button, a mirrored copy of the displayed moulding is created. If a bar already exists for the other side, a dialogue box opens and you decide whether the existing bar should be replaced or not.
You can copy the moulding at any time. All models are also copied.
4.12. Models
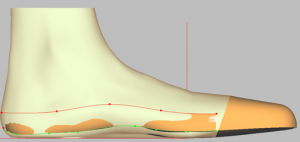
Models are pads, longitudinal arch recesses, etc. that can be positioned on the moulding. You can access the area for editing models by selecting the "Models" option in the main window of the toolbox.
Note: When milling the bedding, it may be advisable to position the models on the bedding. The models are displayed weaker over the mouldings in the bedding construction.

4.12.1.Insert models
To place a model on your moulding, select the "Models" option in the toolbox. You are then in the workspace for editing models. You can select models from the model library in the same way as you select a library moulding.

4.12.2.Position
Positioning is carried out using the following keyboard shortcuts.
Key combination Mouse movement Change
Ctrl key + left mouse button move horizontally right/left
Ctrl key + left mouse button to move vertically up/down
Shift key + left mouse button horizontal width/length (depending on view)
Shift key + left mouse button vertical height/length (depending on view)
4.12.3.Height
You can change the height of the activated model by entering a height in millimetres in the input field. The highest point of the model is adjusted to the specified height. The other dimensions of the model are retained.

Note: You can enter both positive and negative values for the height.
Embed and adopt
Selected models are integrated into the interface after clicking the [Embed] button.
Attention: They are then part of the surface and can no longer be changed.
Selected models are integrated into the interface after clicking the [Apply] button, but can still be selected and edited afterwards.
Note: This can slow down the GP Manager. It is advisable to embed the models. Correct positioning must be ensured before embedding.
4.13. Moulds
Depending on the selected shape, different modelling options are available to you. The options available to you can be found in the description of the individual moulds (see below).

After selecting one of the options "Sole", "Surface", "Hallux", "Base V", "Inner" & "Outer Ankle", the last is brought into the view in which the respective location is best visible.
The area to be modelled must now be defined and modelled. This is done by:
1) Draw a rectangle to define the effective range. To do this, place the
mouse pointer to the starting point of the rectangle and then move the mouse with
with the left mouse button pressed until the desired size is reached.
2) Place the centre (green rectangle) at the desired position on the bar by holding down the CTRL key and clicking the mouse.
3) Modelling the effective range by pressing the buttons o (top), u (bottom), i (inside), a (outside), v (front), h (rear). This causes the centre to move by 1 mm in the corresponding direction, whereby the reference of the change is always the slat. When moving, a view should be selected in which the change can be tracked.
In the effective range, the last is raised (or lowered) according to the following principle:
In the centre (green rectangle) to 100 %. At the edge of the effective range to 0 %.
The other points are calculated from the distance to the centre.
The changes can be tracked in the display on the workspace. The following two displays can be seen:
1) KO: 0 / 0 / 0 [mm] Display of the absolute change (origin in the
Intersection of the longitudinal axis of the foot and the line of the ball of the foot
2) Delta: 0 / 0 / 0 [mm] Display of the relative change
!!!Attention!!!: Modelling on the inner or outer ankle must always be carried out on the
groin and not on the leg!
4.13.1 Heel
After selecting the "Heel" radio button, the last is displayed in the "Outside" view.
Processing is carried out as follows:
| Key combination |
Mouse position |
Mouse movement |
Focus of the change |
| Left mouse button +SHIFT |
Heel |
Horizontal |
Entire heel
|
| Left mouse button +SHIFT |
Heel comb |
Horizontal |
Heel comb |
| Left mouse button +SHIFT |
Outermost heel point |
Horizontal |
Outermost heel point |
4.13.2 Pronation and supination
After clicking on "Pronation", the last is displayed in the "Outside" view, with "Supination" in the "Inside" view. The change is made as follows:
| Key combination |
Mouse movement |
Amendment |
| Left mouse button +CTRL |
Top or bottom |
Raise or lower laterally or medially |
The size of the change is displayed in mm in the workspace. If the moulding already has an increase as standard, this is displayed.
4.13.3 Inner edge and outer edge
After selecting the "Outside edge" radio button, the moulding is displayed in the "Outside" view, or in the "Inside" view for "Inside edge". Editing is carried out as follows:
1) Draw a rectangle to define the effective range. To do this, place the
mouse pointer to the starting point of the rectangle and then move the mouse with
with the left mouse button pressed until the desired size is reached.
2) Place the centre (green rectangle) in the desired position by holding down the CTRL key and clicking the mouse.
3) Elaboration of the scope of action:
| Key combination |
Mouse movement |
Amendment |
| Left mouse button +CTRL |
Top or bottom |
Raise or lower |
The moulding is retracted or extended in the effective area according to the following principle:
In the centre (green rectangle) to 100 %. At the edge of the effective range to 0 %.
The other points are calculated from the distance to the centre.
The changes can be tracked in the display on the workspace. The following two
Adverts can be seen:
1) KO: 0 / 0 / 0 [mm] Display of the absolute change (origin at the intersection of
Longitudinal foot axis and ball line)
2) Delta: 0 / 0 / 0 [mm] Display of the relative change
4.14. Position

After selecting one of the options "Leg", "Heel", "Forefoot", "Sickle", "Split" and "Pointed foot", the last is brought into the view in which the respective location is best visible and the editing points are displayed.
You can adjust these points according to the selected area and move the moulding to the desired position. To do this, grab the respective editing point with the left mouse button and move it to the desired position while holding down the mouse button; the bar follows your mouse movements.
4.15. Circumferential dimensions

If you have loaded a 3D measurement, you can apply the dimensions from this measurement to your moulding by clicking on the [Apply dimensions from measurement] button. If you want to edit these dimensions or adapt a library moulding, enter the desired dimensions in the corresponding field and then click on the [Execute] button. You can also move the position of the dimension lines.
4.16. Leg

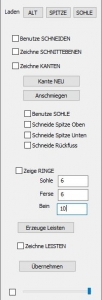
If you want to build up the leg with a last (it does not matter whether it is a library leg last or from a measurement), you can do this here with several rings.
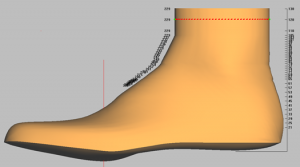
It is recommended not to build one large ring, but several small rings up to the desired leg height. Enter the top height of the last ring in the "Height" field. So if you have a last that is already 150 mm high and you want to build a 20 mm higher ring, enter "Height: 170" in the field and click on [New ring].
When customising the circumference, select a ring by clicking on it. You can now enter the desired circumference for this ring and confirm by clicking on the [Customise] button.
You can remove unevenness from the selected ring by clicking on the [Smooth] button. The selected ring is removed by clicking on the [Delete] button.
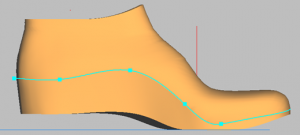
Note: The transitions between the rings can be adjusted using the green dots.



 start the module.
