Various expressions can be selected under this menu. Click on "Standard" to print out a current view. Clicking on the "Footprint" button in the Printer menu generates a 1:1 printout on special footprint paper. The settings for such a paper format must of course also be set with the existing printer.
With the 1:1 printouts, the feet can be printed individually and with A3, both feet can be printed on one sheet.
If you select "Standard", you get the following view:
It is now also possible to save the current view as a PDF.
Note:
Entries that are stored in Info are also printed at the bottom of the paper.
Removes all images that were required to calculate the foot outline.
Attention!!! Processing again (i.e. a reset by clicking on Calibrate) is no longer possible. possible!!!
All unnecessary information outside the outline is cut off, the measurement is enlarged and aligned with the previously vertical foot axis. This ensures a clean display when superimposed on the inlay or moulding in GP CAD.
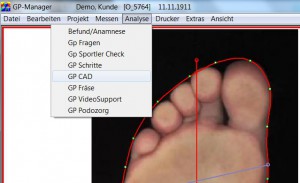
After the automatic calculation of the foot outline, further dimension lines (circumference lines) are displayed. Depending on the settings in the configuration file, the small toe, ball of the foot, toe-in, chip and waist lines and the foot axis are displayed. You can check the locations of the circumference lines and correct them if necessary by clicking on the crosses with the left mouse button pressed.
Then enter the values manually in the programme's measurement box.
Attention:
Setting the above lines is important as they form the basis for adapting to the perimeter dimensions of the moulding when it is transferred to GP OptiCAD. Please also read the chapters on dimensions and fixing in GP OptiCAD. It is also important to place the foot axis, as the moulding will be aligned with the foot axis of the footprint after transfer to GP OptiCAD.
Move the mouse pointer to the toe point of the longitudinal axis (top), then hold down the left mouse button and move the mouse to the right or left. Once you have reached the correction point, release the buttons.
Important:
Please wait for the image to be recalculated.
The outline can be changed by moving the green dots. To do this, move the mouse pointer to one of the green dots, then press the CTRL key and the left mouse button simultaneously. Now move the mouse pointer. Once you have reached the correction point, release the buttons.
Important:
Please wait for the recalculation of the outline.
If the outline is not recognised, you can change the binary threshold value for outline recognition here. To do this, enter a new value after Binary.
The threshold value setting works faster using the white/grey slider. To do this, click on a position within the bar (to the right or left of the vertical red marker), the effect of the new setting is displayed directly on the screen.
If the outline is not recognised, you can hold down the left mouse button and drag a rectangle from the top left to the bottom right around the area that was not recognised. Then click on Delimit. Everything outside the rectangle is now deleted and the outline calculation is restarted.


