All emails in the inbox are displayed in the overview. If emails have already been transferred, the column "Maintained" shows the date on which the email was entered (see Figure 15, marked in red). Emails that have not yet been entered are displayed without a date (green marking).
You can use the email management function to display emails you have sent and delete emails you no longer need from your computer. The view can be switched between the inbox and outbox folders.
Open the email administration via "File" -> "Email administration". Here you get an overview of all your emails.
There are two ways to retrieve emails with GP Mail. You can either "Receive" emails via "File" -> "Email management". Or you can select "File" -> "Receive email" -> "Receive". If you select "Receive e-mail", you can enter the e-mails directly into your system. It is therefore recommended that you use this method.
Click on "Receive" in the following dialogue. A dialogue with status information on email receipt follows. With the default settings, only emails with a matching subject are retrieved. All other emails remain on the server.
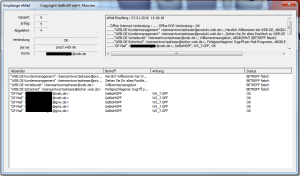
Figure 13 shows what the dialogue for receiving emails looks like. The dialogue shows all emails that are on the server. It also shows the name of the attachments under "Attachment" and the status of the email under "Status". Detailed information on email receipt can be found in the top right-hand section of the dialogue. A detailed error message is also displayed here if the connection to the server fails.
Email status
OKThe email was successfully downloaded from the server
SUBJECT incorrectThis status is only displayed if the email reception is configured so that only emails with the correct subject are downloaded. Emails whose subject does not match are given this status and remain on the server.
If emails have been successfully received, you can select from the existing emails which data you would like to transfer to your database. Close the receive dialogue with the cross at the top right.
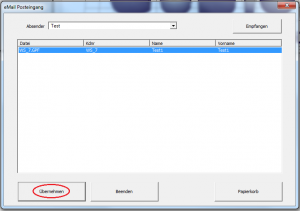
If emails with the correct subject have been retrieved, or if there are emails that have not yet been transferred, you can decide in the email inbox dialogue which emails you would like to transfer.
Click on the desired email so that the email is highlighted in blue. Then click on "Apply" (see Figure 14). Emails from senders that exist in your address book will only appear if you select "Sender" to select the corresponding sender. Unknown senders can be found in the drop-down menu under "Standard". If you do not have any senders in your address book, all emails are listed under "Standard" can be found here.
Attention:
Only one email can be transferred at a time; if you select several emails, the last email selected will be transferred.
Adds the email to the outbox for later dispatch.
Sends the email to the registered senders.
If a subject has been entered in Mail.ini, the subject is appended to this separated by " : ".
You can send your own files as attachments to your email here.
Select this option if you want to automatically send the customer data as an attachment.
Enter additional email addresses in this field, the recipient will also receive the email.
Enter the email address to which you would like to send the email in this field.


