Insert / measurement
There are two views for processing a 3D measurement: "Insert" and "Measurement".
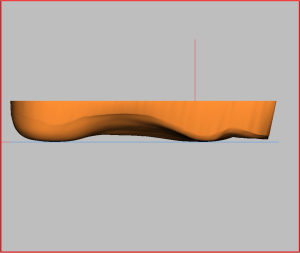
Before working with a 3D scan, you must first align the measurement with the zero line. To do this, select "Measurement" (see Figure 18), the 3D measurement is displayed. Switch to the view "I" or "A" to move the measurement with the arrow buttons (see below) so that it touches or slightly intersects the zero line (horizontal line) (see Figure 19). If the measurement is not on the zero line, the insert is pulled from the zero line to the measurement, which leads to the formation of a step in the insert.
Also check the position of the measurement in the "V" and "H". If the measurement does not correspond to the angle of attack, adjust the measurement accordingly using the arrow buttons.
| Key combination | Movement |
| Left/right arrow keys | Raise/lower the measurement left/right |
| Arrow keys up/down | Raise/lower the entire measurement |
| Ctrl + left/right arrow keys | Rotate the measurement to the left/right |
You can switch at any time between the "Insert" and "Measurement" view by selecting the corresponding option. In the view "Insert" to see the insert. Click on "Measurement", the 3D measurement is displayed.
By switching between the two views, you can get an idea of how well the insert fits the measurement data.

