Manual - GP Branch

1.Overview of services
GP Praxis offers you the following options:
- Networking branches or doctors with the head office
GP branch (order creation):
- Simple recording of patient and measurement data
- Possibility of connecting a GP FootScan and/or a GP MultiSens foot pressure measuring plate
- Additional recording of information on insole care (type of insole, shoe type and shoe size)
- Automatic calculation of the customer's own contribution
- Individual printout of an order with deposit price, health insurance share, quality surcharge and statutory co-payment
- Fast transmission of all relevant data by e-mail to the head office
- Use on a touchscreen
- Attractive interface that can be customised in parts

GP control (management of orders):
- Order entry and control for GP practice
- Clear dialogue for managing orders
- Printout of all order-relevant data
2.GP shop versions
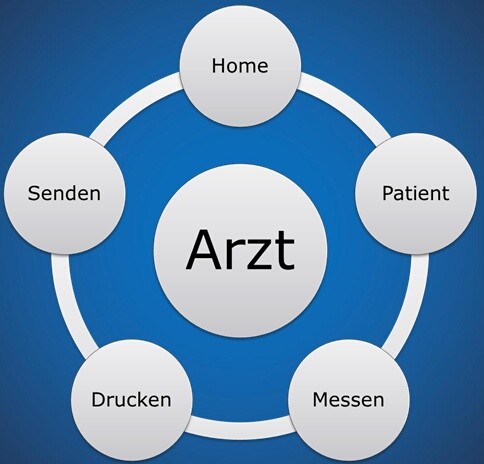
GP Filiale is a modular programme. It runs step by step in a loop.
Individual areas can be omitted if desired. Basically, we distinguish between a doctor version and a branch version.
Doctor version
- Fast recording of patient and measurement data
- Documentation of the order
- Sending information to the control centre
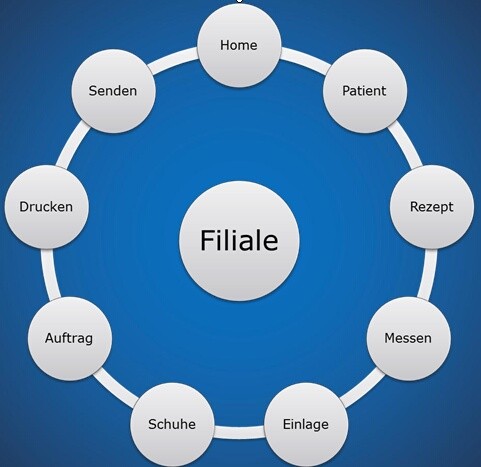
Store version
- Fast recording of patient and measurement data
- Recording a recipe
- Presentation and selection of your inserts with image and text
- Selection of shoe type and size
- Automatic calculation of deposit prices incl. add-ons
- Individual selection of the pick-up location of the deposit
- Documentation of the order
- Sending information to the control centre
3.GP shop home screen
The home screen serves as a start overview from which you can create a new data record.
The logo and the standard practice table can be replaced on the homepage. Please contact us if you wish to make any changes.

At the top right is a hidden button for an order overview.
Order
There is an information button at the bottom right of each page.
Information button
3.1.GP Store orders home screen
An overview of all created data records can be called up via the hidden Orders button.
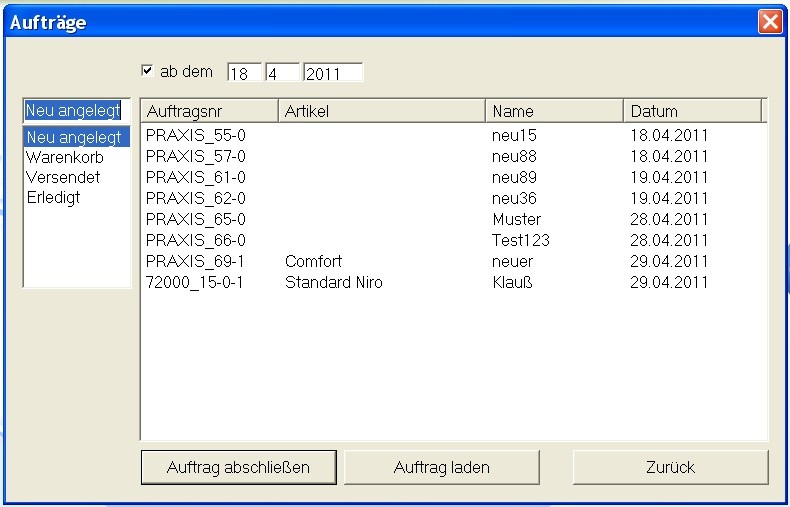
The order overview shows all orders that have been entered since a certain date.
The date filter can be used to display orders from a specific date as required.
Newly created
All created orders that have not yet been dispatched appear under Newly created.
Shopping basket
The shopping basket contains all orders for which dispatch by e-mail did not work.
Dispatched
Here are all the orders that have been sent
Done / Complete order
The function was set up to guarantee that every order sent has also been processed and to obtain an overview of completed orders. With the help of a production list, every order that has been produced can be set to completed.
3.2.GP shop information button
An information window for the respective area can be opened via the information button at the bottom right.
The help texts can be edited with a text editor. They are located in GP Practice\GpSystem\BIB_Texts\Practice.
Both text and images can be inserted. The file format and name may not be changed.

4.GP branch patient
Patients and order information are created via the Patient area.
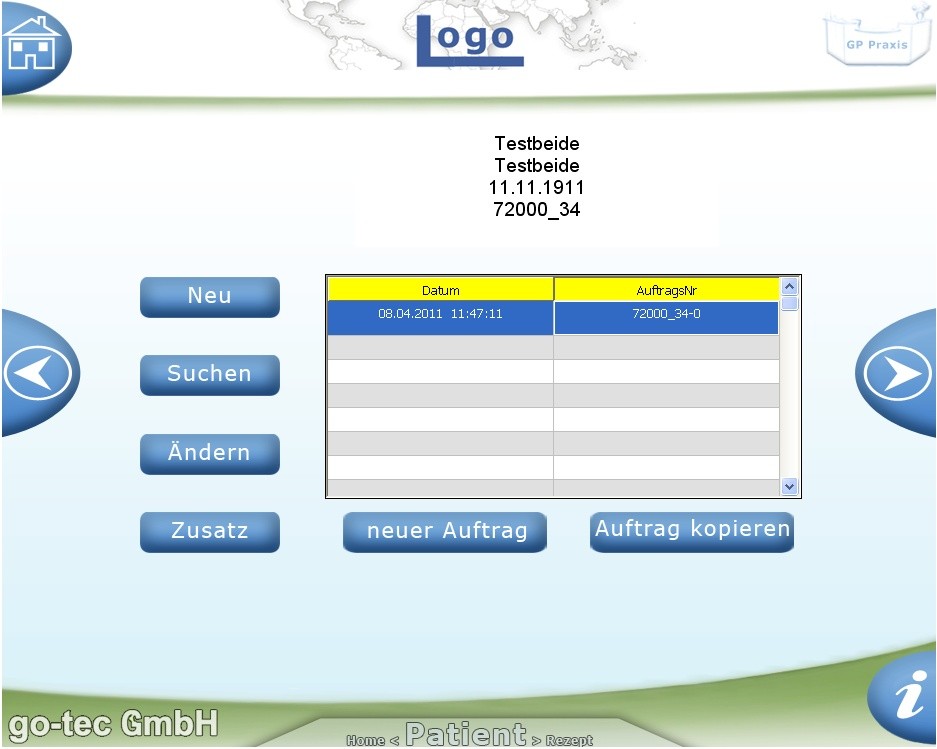
New
Patient information can be recorded using the keypad or a card reader. If a card reader has been set up, simply insert the card. The data is read automatically.
Search
Patients can be searched for either by name, customer number or date of birth.
Change
Incorrect patient information can be changed here.
Addition
Various additions such as height or previous illnesses can be entered here.
New order
A new order can only be created if patient data is available. You cannot continue without an order.
Copy order
Is selected if an existing order is to be resent.
5.GP shop recipe
This page is optional. If it is available, a recipe can be scanned in using the Scan button.
When purchasing a recipe scanner, care should be taken to ensure that Twain drivers are available. Alternatively, a webcam can also be used.
6.GP shop trade fairs
Basically, you can decide whether only pressure measurement, only foot scan or both should be displayed.
Pressure measurement
The pressure measurement is opened via the pressure measurement button and started with the left or right button. The measurement is automatically accepted and can be overwritten in the event of an incorrect measurement.
Foot scan
By clicking on Scan, a 2D scan is triggered and automatically accepted. Scan 2 can be used for scanning insoles.
7.GP shop deposit selection
If images of the inserts are available, these can be displayed as a mini preview image in the insert selection. If no images are available, the column is simply not displayed.

Double-click on the insert to display more detailed information. Either a standard text from the PG08

or an individual text file in which, for example, the main properties of the insert and an image are displayed. If a text file is to be displayed, it must be located in GP_Praxis\GpSystem\BIB_Texte\Praxis. The file must be in .rtf format and can contain text and images.

To create and edit deposits, please use the deposit editor. You can find instructions in our FAQs:
https://gpsupport.de/vernetzung-gp-praxis-gp-filiale-support/
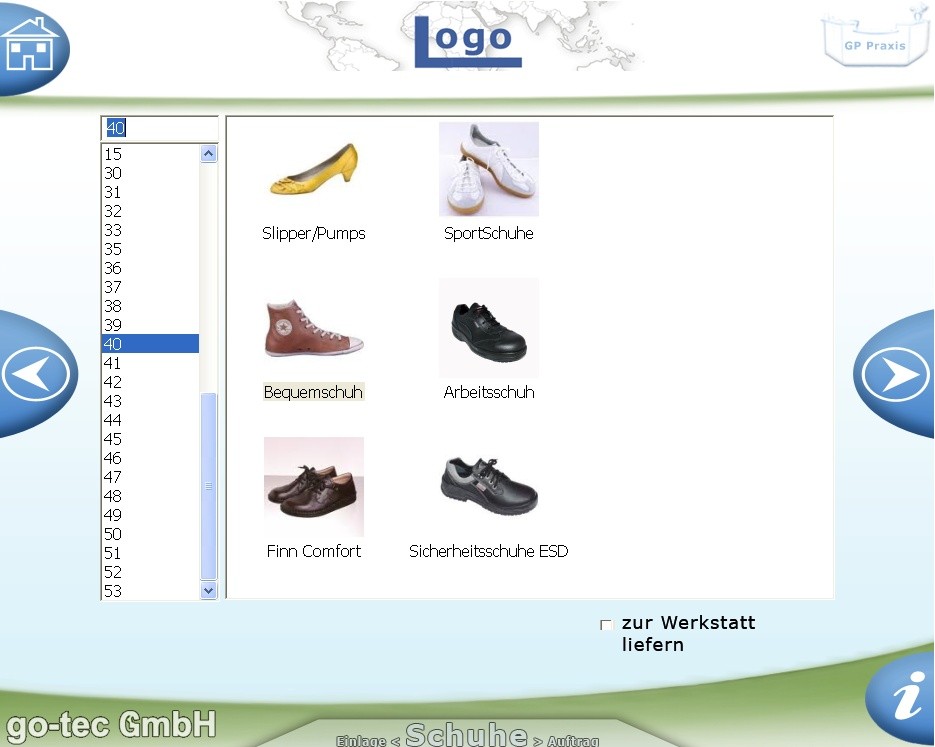
8.GP shop shoe selection
There are six standard shoe types to choose from in the shoe selection. The shoe size can be specified in either EU or UK.
Deliver to workshop is ticked when the shoes are sent to the place where the insole is manufactured.
9.GP Store order
Under Order, you can select where the finished inlay can be collected. In addition to preset branches, there is also a function to send the insert to a specified delivery address. If postage costs are to be charged for this, Post plus postage must be ticked.
Order in a hurry can be clicked for faster processing.
Pick-up date-it is automatically advanced by 7 working days. A different date can be selected by clicking on it.

10.GP Store printing
All cost items of the deposit are displayed individually and clearly in the print area.
The print button can be used to print out a delivery contract for the selected insert.
11.GP Store order
In the Order area, an e-mail can be sent to the head office using the corresponding button or the order can be changed from New status to Ordered status.
The KV button changes the status to KV.
12.GP order list
All orders are clearly displayed in the order list.
The view can be limited by selecting a date at the top right. By clicking on the table headers, you can sort the content in ascending or descending order. The selectable statuses are determined in advance and can be defined in the settings. You can either open a selected order by double-clicking on it or change its status or cancel or delete the order by right-clicking on it.
automated status:
An order that has been viewed in GP Control is assigned the status Central.
A job that was printed via GP Control is assigned the status Production.
manual status:
In GP control, the status can be set accordingly via Continue to ROH/CAD. The type of insert, which was defined via the insert editor, determines what happens after Next to.
You can use praxis.ini to set whether a new order is given the status Ordered or ROH or CAD:
[SEND]
B_Use_Check = yes // no=the insert type e.g. ROH or CAD=the status in the order list, yes> status =ordered
| Status | Explanation |
|---|---|
| New | An order has been created but not confirmed via the 'Order' button. |
| Ordered | All orders that have been confirmed in the GP shop via Order.
EXCEPTION: There is also a variant for assigning the orders the status ROH or CAD directly (B_Use_Kontrolle = no). |
| Centre | All orders that previously had the status Ordered and were then opened in GP Control. |
| ROH | Orders for which the Continue to ROH button was clicked in GP Control or where it is set in GP Branch that all orders are assigned directly to ROH or CAD. |
| CAD | Orders for which the Continue to CAD button was clicked in GP Control or where it is set in GP Branch that all orders are assigned directly to ROH or CAD. |
| to the CT | Orders that have been assigned the status via the 'To CT' button in the BP branch. |
| Production | All orders for which Print was clicked in GP Control. |
| Shipping
Ready Cancellation | Assignment is only possible by selecting the orders (for multiple Shift or CTRL) and right-clicking. |
13.GP Control
GP Control is the module for displaying all data recorded in the shop. With a 2D scan, the outlines can be set by double-clicking on the scan. If the outline is not recognised correctly, this can be adjusted using a slider. The module can be used to generate different types of printouts (workshop sheets or 1:1 variants). If the inlay is to be designed on the PC or displayed in 1:1 on the screen, a shortcut in the top right-hand corner takes you directly to the GP foot measurement module.