Method 1: Step foam fixed
- The setup for the scan should look like Figure 4.
- Place the step foam on an elevation of approx. 30 cm. Make sure that the elevation does not protrude over the sides of the foam.
- The impact foam should stand freely on the table or on the floor within a radius of approx. 50 cm. Other objects could interfere with the measurements.
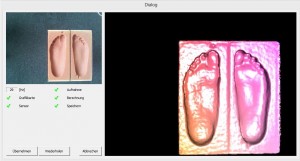
- If you only want to scan one step foam, make sure that you have selected the correct side. You can recognise this by the red frame (see figure 1, here the left side is selected). You can change the side by pressing :
- click with the mouse on the corresponding page.
- You can use the buttons "Links" or "Right" click here.
- To start the scan, select "Scan page„
- You can also scan two tread foams at the same time, in this case select "Scan both", in this case it does not matter which side is selected.
- The live image window of the 3D scanner opens. Important: here you must Make sure that the heel is pointing downwards.
- The measurement starts automatically after 5 seconds and also ends automatically after a further 5 seconds.
- To improve the quality of the scan, you can move the scanner slightly to capture the edge areas of the footfall foam.
- The measurement is then automatically accepted and is ready for further processing.
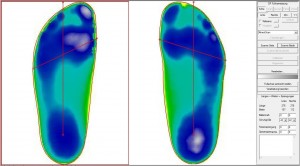
- Once the scan is complete, position the line for the bale size and the foot axis. Then click on "Verticalise the foot axis„.
- You can enter the dimensions you have measured for the ball of the foot, heel and instep dimensions together with the measurement. This is particularly useful if you want to create a last in CAD with the measurement.
- If you want to scan your footboards the wrong way round (left foot on the right side, right foot on the left side), please contact us.


