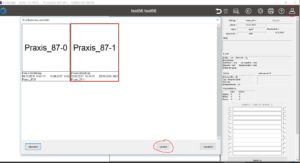
From version 7.3

GP Filale orders can now only be deleted via the order list. The order must be searched for via the status and can then be removed by right-clicking and deleting the order.

Up to version 7.2:
Orders that have been created cannot be deleted in the BP Branch module. Once an order has been ordered, it can no longer be changed.

There are two ways to delete an order:

1. open GP Manager, load customers, open GP control and click top right

2. open GP Manager, open GP order list, select order, right-click, delete order completely

A view is added to the print page via the print page editor and the Classic type.

PRAXIS_AB
PRAXIS_EINLAGE_TXT
PRACTICE_INSERT_BMP
PRACTICE_CONTROL
PRAXIS_SCAN
PRAXIS_DV
PRACTICE_RECOMMENDATION
BARCODE_PG08_0
BARCODE_ART_0
PRACTICE_PHOTO
PRACTICE_FOOT_SCAN_INDIVIDUAL_LEFT
PRAXIS_FUSSSCAN_INDIVIDUAL_RIGHT
PRACTICE_CONTROL
PRAXIS_DV_TRITTSPUR
PRACTICE_DV_INDIVIDUAL_LINKS
PRACTICE_DV_INDIVIDUAL_RIGHT
PRACTICE_BALANCE
PRACTICE_MATERIAL_STRENGTH
PRAXIS_ABKONTROLLE
BALANCE_LEGEND
FLEXDATA_LEGEND
PRACTICE_ENTRY_DATE
PRACTICE_FILIALE
PRACTICE_PROCESSOR
PRACTICE_COLLECTION_LOCATION
PRACTICE_ABHOLDATUM
PRACTICE_SHOE_SIZE
FRAESE_EINLAGE DV_LEGENDE
FRAESE_MULTI
FUSSMESS_EinsZuEins
FUSSMESS_Parameter
BALANCE_OneToOne
Print_Standard
DV_OneToOne
DV_FLEXDATA_BMP
DV_FLEXDATA_KURVEN DV_Total
DV_footprint
CADF_INFO
Print_ANAM_PODOPOSITION
Print_Answers
DRUCK_APOTHEKE_AUFTRAG Print_Evaluation
Print_BALANCE_OneToOne
PODO_RUECKEN_2D
PODO_RUECKEN_3D
PODO_RUECKEN_ISO
PODO_PODOSCOP
PODO_BEINE
PODO_PAGE PODO_TABLE
BIKE_ONE_ONE
BIKE_TOTAL
BIKE_INFOS
BIKE_INFO_RIDER
BIKE_INFO_MEASUREMENT_SERIES
BIKE_INFO_MEASUREMENT
DRUCK_ANAMNESE
DRUCK_BEFUND
QUESTIONS_ANALYSIS


To use mail dispatch, you need a sender and a recipient. Normally, the sender is the branch and the recipient is the head office. The same e-mail can be used for both locations.

FILILE

Enter the shipping address:

Enter the recipient:

C:\GPM_V7\GPSystem\GpSystem_your_branch\practice.ini
[EMAIL_ORDER]
b_SendImmediately = yes
T_TO = praxis@go-tec.de //Address to which the mails from the branch are sent
T_CC =
T_BCC =
T_SUBJECT = PRAXIS //only mails with this subject are loaded


CENTRE

To use the EasyScan 3D product, we recommend a desktop PC.

It must be possible to play current games in full resolution on the PC.

Further system requirements

To assemble the split moulding, you will need the following connecting materials:

  • Metal pins: Ø 5 mm, l = 40 mm
  • Countersunk head screws: 4.5 x 70 and 4.5 x 50
  • M8 threaded rods, the length of which you can cut as required
  • Cable ties, for moulding the tip


Please refer to our manual for more information Working with GP moulding pressure

Manual – GP moulding printing


  • Then open the INI settings:

  • The following window opens:

  • The correct INI must be selected in the drop-down menu: GP_CAD_LEISTENDRUCK

  • Then double-click on the "Printer" parameter:

  • Now select the "I_Standard" parameter:

You can now enter the corresponding parameter in the field on the right-hand side (red arrow). The "1" stands for the LP 333, the "2" for the LP 222, the "3" for the LP 322 and the "4" for the LP 433. The corresponding parameter is saved by clicking on "OK". If you now reopen the "GP LeistenDruck" module, the change should take effect immediately. Otherwise, please restart the GP Manager.