How to set up your Microtek scanner for optimal measurement
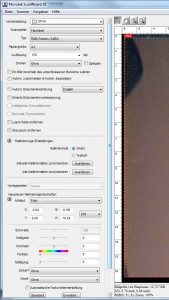
To achieve optimum results for the 2D foot scan, please use the following settings:
- Start the GP Manager
- Select a customer "Project“ -> „Determine„
- Select "Trade fairs“ -> „Foot measurement„
- Make sure that "FootScan" is selected
- Select "Settings ...“
- If a selection window opens, select "Microtek ScanWizard DI (TWAIN)„
- If a click does not produce any results, you can also change the settings directly via the ScanWizard DI. To do this, select the Start menu at the bottom left of Windows and click on "All programmes“ -> „MicrotekScan Wizard DI for Windows“ -> „ScanWizard DI". All changes are adopted by the GP Manager for scans.
- Due to an error in the scanner manufacturer's driver, the values in the menu can only be changed by :
- The value is entered using the keypad
- Click on the field to be changed and select the value with the arrow keys
- Select as Type: RGB colours (24-bit)
- Select as Paper size: A3
- Select as Resolution: 150 dpi
You can use the default settings for all other settings.
If you need the image rotated, select "Turning" the corresponding value.
If you have changed settings, you can see the settings in the screenshot. The dialogues differ depending on the version of the installed driver. Select the screenshot that corresponds to your version.


