How can I import/export or save GPF files?
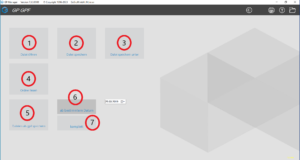
To import/export or save files as GPF, click on the "GP GPF" tile on the GP Manager after selecting a customer.
- Open file
The "Open file" tile is selected if you want to add a GPF file to the selected customer.
Clicking on this opens a browser window in which the corresponding file can be selected. This is done by clicking on the "Open" button.
- Save file
The "Save file" tile is selected if the selected customer with all measurements is to be saved as a GPF file.
This is done by simply clicking on the tile. When the file has been saved, "Written files: 1" appears in blue at the bottom centre.
- Save file as
The "Save file as" tile is selected if the selected customer is to be saved in a different file path or if only certain measurements or designs are to be saved as a GPF file.
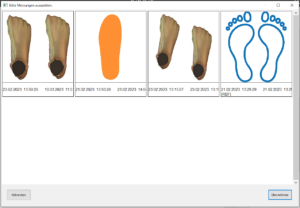
Clicking on the tile opens a window in which the measurements and constructions of the selected customer are displayed.
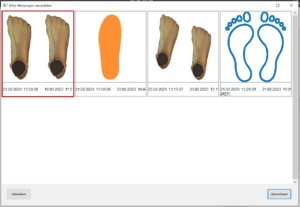
Clicking on a measurement selects it and gives it a red border.
To select several at the same time, press the CTRL key and then select further measurements or constructions by clicking with the mouse. 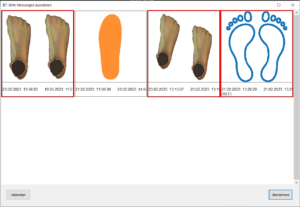
This is again indicated by the red border. Confirm this by clicking on the "Apply" button.
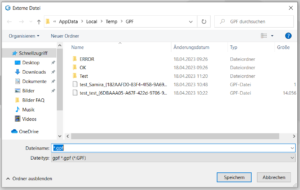
Next, select the storage location in the new window and confirm with the "Save" button.
- Read folder
The "Read folder" tile is selected if a folder with several customers is to be integrated into the GP Manager.
Clicking on this opens a browser window in which the corresponding folder can be selected. This is done by clicking on the "OK" button.
- Save files as gpf
The "Save files as gpf" tile is selected if the complete data set or data from a specific date is to be saved or transferred.
Firstly, you can choose between "from specific date" and "complete" from the small tiles. If the tile is activated, it is displayed in a darker colour.
- as of a certain date
The "From a specific date" tile is selected to save or transfer data from a specific date up to today.
To do this, select the desired date in the drop-down menu next to the tile and then click on the "Save files as gpf" tile and select the storage location in the window that opens and confirm with the "OK" button.
Note: If today's data is to be backed up or transferred, a day before today's must be selected in the drop-down menu.
Once the process is complete, "Written files:... " appears in blue at the bottom centre.
- Complete
The "Complete" tile is selected to save or transfer the entire data record.
If this is activated, the "Save files as gpf" tile is clicked and the storage location is selected in the window that opens and confirmed with the "OK" button.
Once the process is complete, "Written files:... " appears in blue at the bottom centre.

