Installing the GP Manager on a new computer
If you are switching from XP to a newer operating system, please also read: "What should I bear in mind when switching from Windows XP?“
- Follow the steps below: How can I back up the data from my GP Manager??
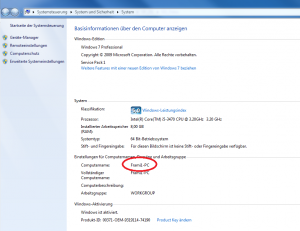
- Write down the name of your computer. You can find this via "Start“

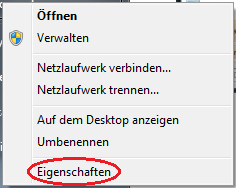
- Click with the right mouse button on "Computer“

- Select "Properties“

- Make a note of the "Computer names„

Install the base system on the new computer
- If you have not yet installed the operating system, enter the old computer name during the installation (see point 7 above). In this case, make sure that you rename the old computer if you want to continue using it in the same network. If you have already installed other programmes, skip this point.
- Carry out the installation of the GP Manager basic system using the installation CD.
- Restart the computer after successful installation.
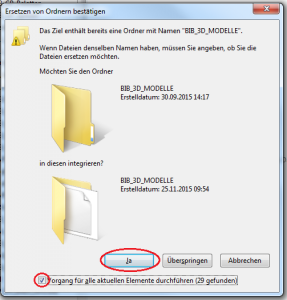
- Copy the "GpSystem" and "GpTools" folders to the folder of the newly installed GP Manager. Make sure that you copy the "Perform procedure for all current elements" and click on "Yes„

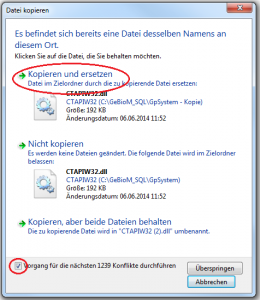
- Proceed in exactly the same way with files. Confirm that they contain the "Carry out the procedure for the next conflicts" and click on "Copy and replace„.

- Import the GPF files again "Import exported GPF files„.
- Try to start the GP Manager. If the GP Manager now starts and you do not want to operate the GP Manager via a network, the installation is complete.
- If the GP Manager does not start and an SQL error follows, as well as "And goodbye..." follow the steps in: "After starting, an SQL database error appears and "Well then, goodbye"„.
- If this is not successful, please contact GeBioM Support.
If you want to use the GP Manager as a server, follow the instructions under: How to set up the GP Manager on a server.