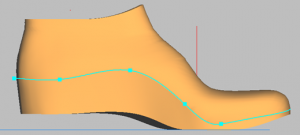
5 Gross mouldings
The CAD+ module must be activated to produce a gross moulding.
You activate CAD+ and Brutto in the function box.

Now click on the [<<Library] button with CTRL and the left mouse button. If you now switch to one of the two side views, i.e. inside or outside, you will see the gross bar.
In the toolbox under [Dimension], you can now edit the bedding and adjust it to the mouldings as follows.

You can use "Position" to position the footing as usual. You can also optimise the dimensions of the footing with length and width as already known from OptiCAD or InsoleCAD.
By selecting the "Gross" option, you can edit the end edge of the moulding. Click on the [Standard] button to reset this.
If you activate the "Roll" option, you can edit the heel break and also the toe lift of the ballast. If you then tick the "Use" box, your settings will be applied to the footing or gross last. You can also enter the corresponding material thicknesses (3 boxes under "Roll" and "Use") in the fields and then select "Use".
By selecting the "Subgrade" option, you can edit the end edge of the subgrade. Click on the [Default] button to reset this.

If you want to see the bedding individually, i.e. without the moulding, you can select [Insert] in the function box. Activating [Mouldings] again takes you back to the view of the gross moulding.
As described in the following chapter, you can also transfer these gross mouldings to the gross mouldings for production using the [Milling] and [3D printing] buttons.