7.3 Insert filament/change filament process
The process for changing the filament always takes place in 2 stages - removing the old filament and inserting the new filament. If the filament is being inserted for the first time (there is no filament to remove), simply go through the process as if filament is already included.
| 1 |
Open the menu Filament changeby pressing the filament change button (1)
|
|
2 |
REMOVING THE OLD FILAMENTSelect the melting temperature of the installed filament (2) using the up and down arrows.
For the filament Addigy® FPU 79AR8 this temperature is 250-265°C.
Press the "Next" button (4) to go to the next step.
To cancel the process, press the cancel button (1). Press the Back button (3) to return to the Settings to return.
|
|
3 |
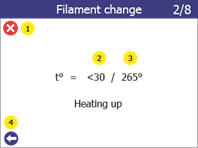
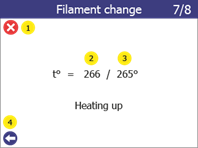
The printer starts to heat the print head to the selected target temperature.
The process continues automatically as soon as the target temperature is reached.
During heating, both the current temperature (2) and the target temperature (3) are displayed.
To cancel the process, press the cancel button (1). Press the Back button (4) to go back one step.
|
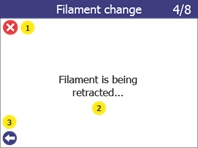
| 4 | When the target temperature is reached, the printer starts to remove the filament.
This starts with pulling back the filament in step 3/8 to ensure that no old filament remains in the nozzle and causes a blockage. As soon as the push-out is complete, the printer starts to remove the filament from the nozzle in step 4/8.
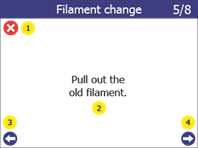
As soon as the filament has been withdrawn from the extruder, continue with step 5/8. Gently pull on the filament until the end comes out of the Teflon tube. The printer is now ready to remove the filament spool, either to replace it with a new spool or to store the filament.
Press the "Next" button (4) to go to the next step.
The current status of the procedure can be seen on the screen during the individual steps (2)
To cancel the process, press the cancel button (1). Use the Back button (3) to go back one step.
|
|
5 |
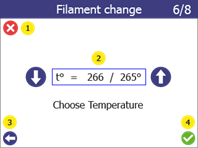
INTRODUCING THE NEW FILAMENTSelect the melting temperature of the new filament (2).
For the filament Addigy® FPU 79AR8 this temperature is 250-265°C.
Press the "Confirm" button (4) to go to the next step.
To cancel the process, press the cancel button (1). Use the Back button (3) to go back one step.
|
|
6 |
The printer starts to heat the print head to the selected target temperature.
The process continues automatically as soon as the target temperature is reached.
During heating, both the current temperature (2) and the target temperature (3) are displayed.
To cancel the process, press the cancel button (1). Press the Back button (4) to go back one step.
|
|
7 |
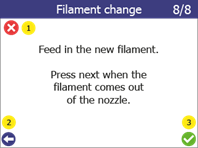
As soon as the printer has reached the target temperature, it starts automatically and attempts to extrude.
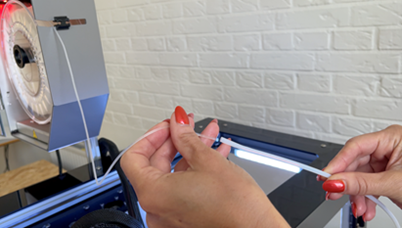
Insert the filament into the filament tube.
Push it down until the print head grabs it. Then release the filament and look at the lower end of the print head.
As soon as the print head starts to extrude the filament at a constant shape and speed, press the "Confirm" button (3)
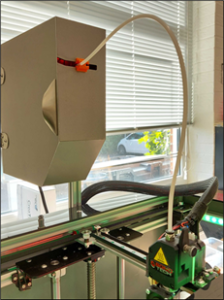
Attach the filament tube to the print head and the filament chamber using the connector (see section 7.2.2)
The filament replacement process is now complete.
To cancel the process, press the cancel button (1). Use the Back button (2) to go back one step.
|


