Working in the workspace
By clicking on the order in the order list, the last or trial shoe is displayed in the workspace.
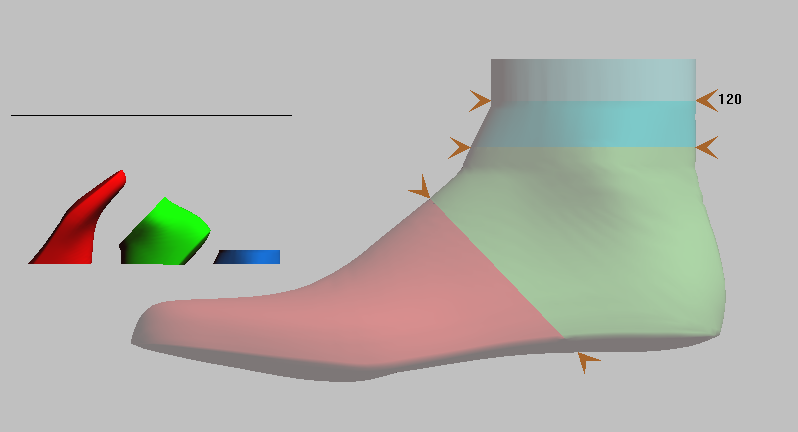
If the print job for a test shoe is selected, the following view is displayed:

The test shoe is divided into three parts for the printing process: Toe (red), heel (green) and leg (blue). The entire trial shoe is shown on the right-hand side. The orange triangles mark the cutting lines where the trial shoe is divided. The cuts can be moved by clicking on one of the triangles. In the leg area, the height (in mm) at which the height of the trial shoe is cut off is displayed on the cutting line.
On the left-hand side, the individual test shoe parts are displayed as they are positioned on the print bed. The black line above the parts indicates the maximum print height of the printer.
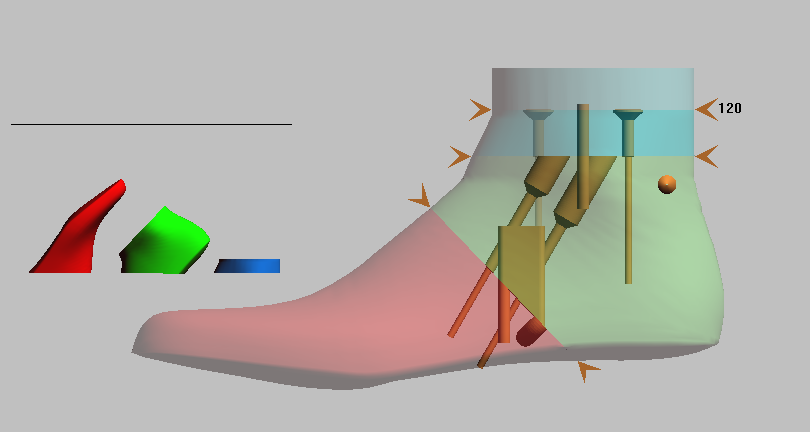
If the print job for a moulding is selected, the following view is displayed:

The last is also divided into three parts as standard: Toe (red), heel (green) and leg (blue). When the last print job is called up, the individual elements of the last are displayed on the left-hand side as they are positioned on the print bed.
The entire moulding is also shown on the right-hand side. In addition to the cutting lines, connecting elements are also drawn in so that the moulding parts can be joined together. These must also be positioned. The description of the individual elements and the special features of positioning are described in more detail in chapter 4.