In OptiCAD you have the option of measuring distances or dimensions. To do this, you must be in a standard view. Move the mouse to the starting point from which you want to measure. Press the right mouse button and hold it down while moving the mouse.

The information on the measuring section is displayed in the bottom left-hand corner of the workspace.

  1. Current cursor position (relative to the origin of the coordinate system)
  2. Current cursor position (relative to the starting point of the measurement)
  3. Absolute length of the measured distance (in mm)

Note:         If you want the most accurate measurement possible, zoom in as close as possible to the area to be measured. The smaller the bar is displayed, the greater your measurement error.
The moulding can be zoomed in to view details of the model.

Key combination Mouse movement/button Zoom
Mouse scroll wheel before

back

Zoom in

Zoom out


< button < Zoom out


Shift + < key > Zoom in


Note:         When zooming with the mouse wheel, the perspective changes as the area under the mouse cursor is zoomed.

Attention:        If zooming in with the mouse scroll wheel does not work, make sure that the window is activated. Click once on the workspace with the left mouse button. If the window is activated, make sure that the 1:1 view is not activated.

To view the moulding from any perspective, you can rotate the moulding with the mouse or the arrow keys.

You can rotate the model using the following key combinations:

Key combination Mouse movement/button Rotation
Shift + left mouse button forwards/backwards

left/right

Rotate around the X-axis

Rotate around the Y-axis


CTRL + Shift + left mouse button left/right


Rotate around the Z-axis


Shift + arrow keys top/bottom

left/right

Rotate around the X-axis

Rotate around the Y-axis


CTRL + Shift + arrow keys left/right Rotate around the Z-axis

The moulding can be moved on the work surface using the mouse or keyboard.

Key combination Mouse movement/button Direction
Ctrl + left mouse button forwards/backwards

left/right


Moving on the Y-axis
Moving on the X-axis


Ctrl + arrow key top/bottom
left/right
Moving on the Y-axis
Moving on the X-axis

The moulding is displayed as a three-dimensional object on the workspace. The display on the workspace can be customised using the buttons in the "Function box".

To edit a moulding, make sure that the [Mouldings] button is activated in the function box. If the button is activated, you are in the GP OptiCAD module. If you have already selected a moulding, this moulding will be displayed on the workspace.

If you move the mouse cursor over the workspace, you will always see the current position in relation to the origin of the coordinate system at the bottom left. In GP OptiCAD, the origin is always the point at which the bale line intersects the foot axis.

Note:         If the [Bars] button remains greyed out after clicking on it, the module is not activated. In this case, please contact GeBioM mbH Support.

Attention:        If operation via keyboard shortcuts does not work, the GP Manager window is not active. Click once in the window to activate it.

Now that you have an overview of the structure of the GP CAD module, the functions of GP OptiCAD are described in detail in the following sections.

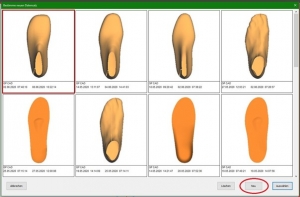
If you have already created a moulding and want to design another one for the customer, click on the  -symbol. The following window then opens:

Now click on the [New] button at the bottom right to create a new design. If you want to continue working on an old design, you can simply double-click or single-click here and then click on the [Select] button to call it up again. You can enter additional information for each design by double-clicking in the text field.

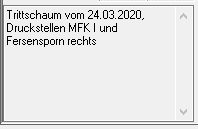
The notes that you have written in the currently selected measurement (in the GP foot measurement module) are displayed in the notes field.

Once you have completed the design, the finished lasts can be transferred to the GP last printing module by clicking on the [3D printing] button. Here you can send the order to the 3D printer and print a trial shoe or last.
Click on the [Milling] button to send a milling order.