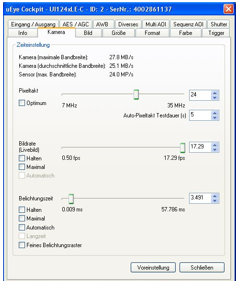
Setting the exposure time, frame rate and pixel clock
- To set the exposure time, frame rate and pixel clock, start the Ueye Cockpit programme and select the desired camera (see section 4.d.i).
- The "Properties" icon is selected in the menu above.
 The "Camera" tab is selected. The "Pixel clock", "Frame rate" and "Exposure time" parameters are available there.
Set the pixel clock as high as possible without failure messages being displayed. The pixel clock depends on the camera used (heart rate). The higher the pixel clock, the higher the frame rate. In the "Frame rate" section, be sure to activate the "Hold" tick to retain this setting permanently.
The exposure time parameter influences the sharpness of the individual image. The optimum range is 4-7ms. This can be used to influence the brightness of the image and the sharpness of the individual image at the same time.
Please activate the "Hold" tick here too.

- Finally, the changes to the parameters are saved in the corresponding file. To do this, select the menu item: File -> Save parameters -> To file and select the following path: ./GPM_V7/GPSystem/INI.
The file for the first camera is
Config_Highspeed_UEYE_1.ini (Camera 1)
The changes in the GP Manager then take effect. The GP Manager must be restarted. If several cameras are used, the above points must be carried out individually for each camera.