Manual - Body Status Check

1.Introduction
GP Bodystatus Check is a module in GP Manager. In addition to our measurement systems, it is used to document patient data in the form of medical history questionnaires. You can customise the scope of the questionnaires to meet the individual needs of each customer.
At the end of the run, a PDF document with all the parameters collected is output, which you can save locally, print and/or send by e-mail.
2.Technical information
2.1.Installation
GP Body Status Check is part of the GP Manager and must be activated by a GeBioM employee.
If you have purchased a new GP Bodystatus Check, the various modules can be subsequently activated in a support session, for which the computer requires an Internet connection. The number of modules depends on your product selection.
2.2.System requirements
GP Body Status Check works from GP Manager version 7.2.
You can find out which system requirements you need and which operating systems are supported in our Compatibility overview.
3.Overview
To use the programme, select a customer from your customer library or create a new customer.
In the main menu of the GP Manager, you will find the GP Body Status Check module under the button (Figure 1):
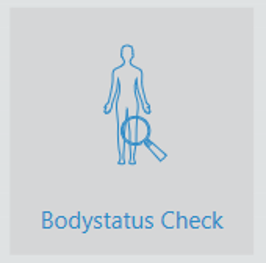
Figure 1: Button module GP body status check
Clicking on this button opens a menu (Figure 2):
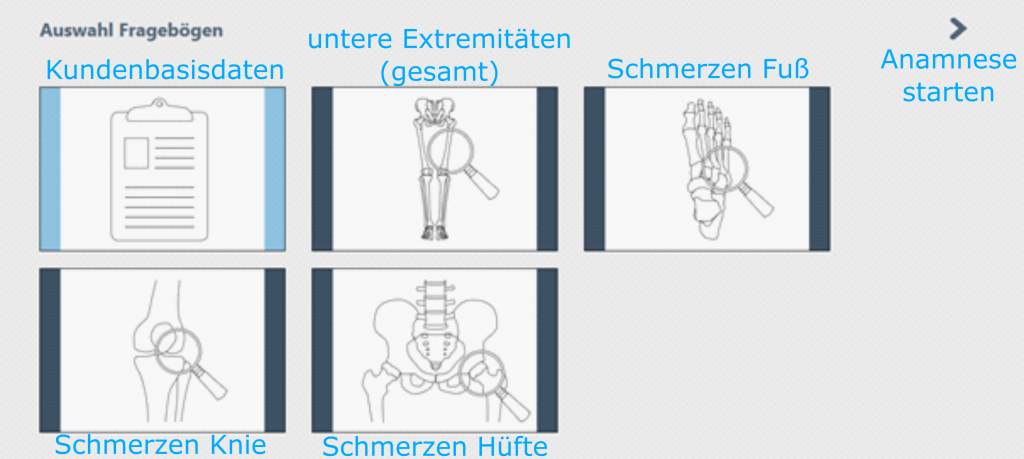
Figure 2: Body status check submenu; the button border changes colour when a menu is selected (see customer base data)
Here you have the option of choosing between different packages. On the one hand, the overall view of a category is always offered (e.g. lower extremities (total) incl. customer data). You can then choose between individual areas (e.g. foot, knee, hip, etc.) and thus compile your own survey.
Once you have made your selection, which you can see on the light blue border, click on the forward button on the right to start the anamnesis.
3.1.Surface
The entire module is structured and goes through the human body from bottom to top with the help of a questionnaire. General questions are asked about the customer, followed by the pain examination.
The programme header contains (from left to right) the Back button, which takes you back to the main menu, as well as the name of the module and the customer name. On the right-hand side is the customer button with which you can open old data records from the archive. Next to it is the Home button, which takes you back to the main menu (Figure 3).
On the left-hand side is a little man who shows you which area of the human body you are looking at in the survey (Figure 7).

Figure 3: Programme header
To switch between pages, there is a forward and back button to the right and left of the respective heading (Figure 4).

Figure 4: Forward and back button
Collecting the data is simple.
On the one hand, there are free text fields highlighted in grey in which you can enter numbers, words or completely free text for your patient documentation, depending on the question.
On the other hand, there are selection buttons that you can select with a left click. Depending on the question, you have the option of making only one selection (single choice) or clicking on several options (multiple choice) (Figure 5).
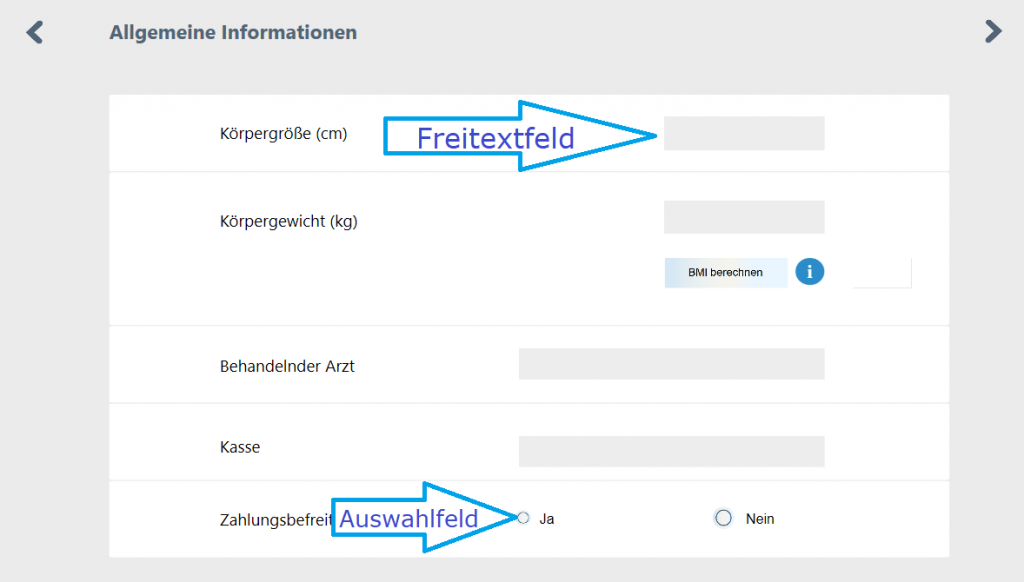
Figure 5: Free text fields highlighted in grey for your customer details and notes, as well as selection fields to click on
3.2.Functions
Click on the blue info button (Figure 6) to open the info window at the bottom left of the screen (Figure 7).
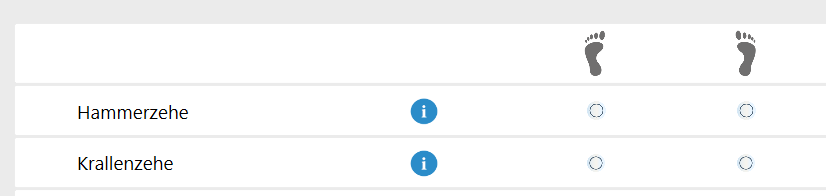
Figure 6: Info button
Here you will find images, texts and/or GIFs to help you.
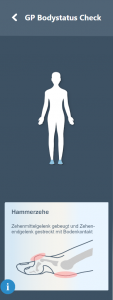
Figure 7: Info field
Calculation of body mass index (BMI) (customer data)
Once you have entered the height [cm] and weight [kg] data, you can log in by left-clicking on the [Calculate BMI] (Figure 8) to calculate the body mass index and take the rating from the table (Figure 9) in the info window.
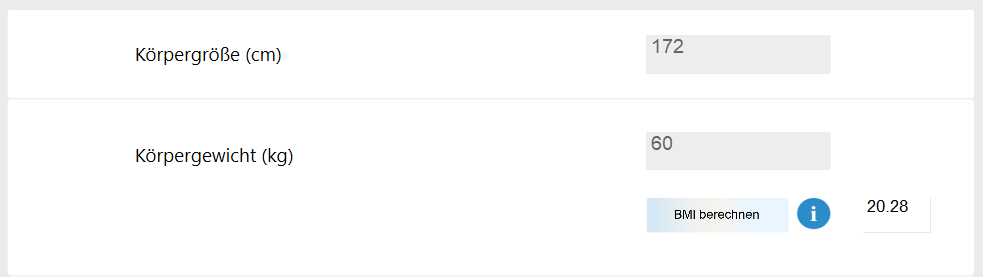
Figure 8: BMI calculation
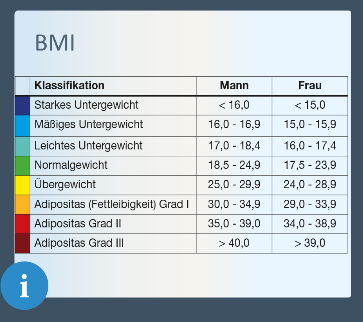
Figure 9: BMI table in the info field
Pain specification via slider
The pain data is always collected separately for the left and right side.
The pain is specified using a slider (Figure 10). Here you can use the left mouse button to move the slider to the appropriate number, which is also displayed next to it. The scale goes upwards from 0 to 10, with zero meaning no pain and ten meaning the most severe pain imaginable. You will find the numerical value in the PDF output.
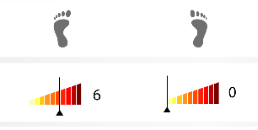
Figure 10: Slider for pain indication
In addition, the localisation of the pain can be indicated for the foot and thigh (Figure 11).
Select the affected area in the illustration. This is then highlighted in light blue and the corresponding slider opens in the info window. Select the corresponding pain area here. The following areas can be selected:
Dorsal:
- Toes (total)
- Bunion
- Small toe bunion
- Tension
Plantar:
- Toes (total)
- Metatarsal heads (total)
- Plantar fascia
- Heel
The programme saves your selection by selecting a different area or by pressing the Next button. This pain indication is output in the PDF. If you then select a new area, your previous selection remains saved, but there is no marker on the foot image.
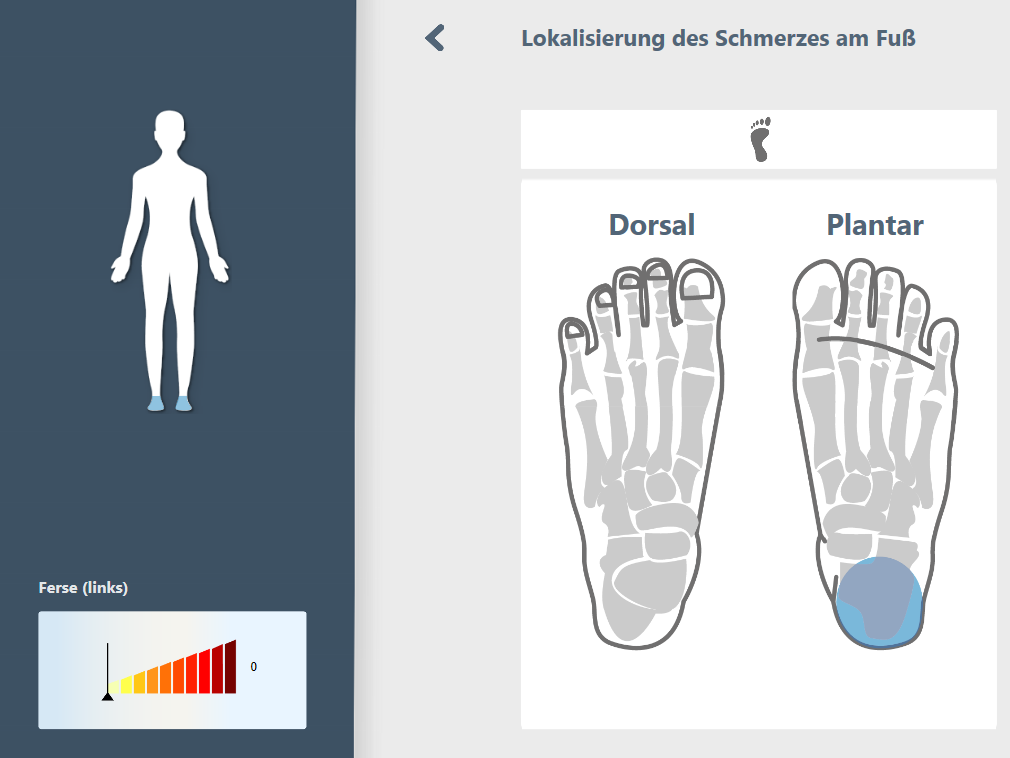
Figure 11: Pain information on the foot: You select an area of the foot (in the picture: heel on the left). The area is then highlighted in colour and the pain slider opens in the info window. Your selection is saved and displayed in the PDF.
Edition PDF
After you have gone through all the questions, the Next button on the last page automatically creates a PDF document that summarises your medical history clearly.
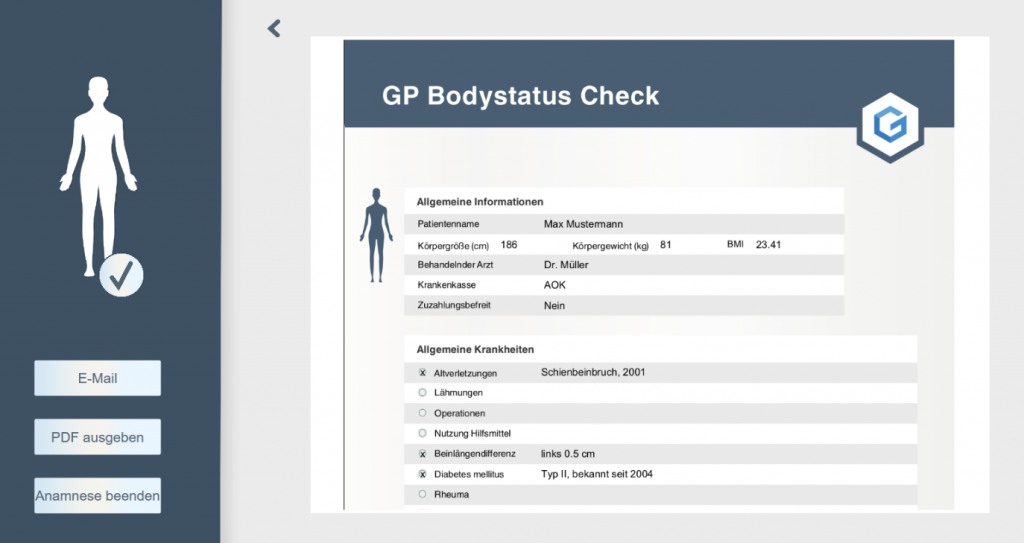
Figure 12: PDF output
Under the button [e-mailThe PDF document can be sent by e-mail (Figure 12). To do this, enter your customer's e-mail address and press accept. The GP Mail module must be set up for this function. You also need a valid e-mail address for sending.
With the button [Output PDFThe Windows print function opens in a separate window. Here you have the option of saving and/or printing the document. To save, select the "Printer" Microsoft Print to PDF (Figure 13) and to print, select your printer. The anamnesis is then finished and you can return to the start page via the back button at the top left or via the [Finish anamnesis].
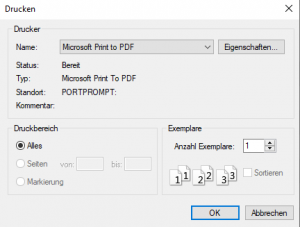
Figure 13 Printer settings for saving the PDF