1.Safety instructions
- Only operate the printer as described in the manual to avoid personal injury and damage to property.
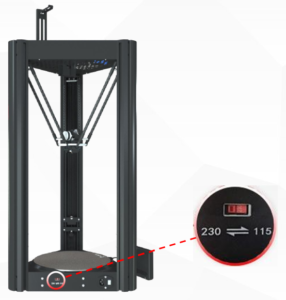
- The standard input voltage of the printer is 230 V. If the local voltage is 115 V, ensure that you switch the input voltage before commissioning the printer.
- The assembly videos, the configuration file and the cutting software are contained on the U-disc, please save the files on the U-disc to your computer before use.
- Do not place the printer near flammable, explosive or high heat sources, make sure that the printer is in a safe and stable printing environment.
- When the printer is in operation, do not touch the parts with high temperature, such as the hot print bed and the nozzle, to avoid burns caused by high temperatures.
- Children and untrained personnel must not use the printer alone.
- It is recommended to use the filament recommended by the manufacturer, which can not only reduce nozzle clogging but also ensure print quality.
- To ensure the service life of the printer, regular maintenance of the printer, in particular the effector module and the cable rail as well as other important parts, is required.
- In the event of an emergency during printing, please click the emergency stop button on the screen or switch off the power directly.
- If you are not using the printer for a longer period of time, please disconnect the power cable to ensure safe use of the power.
- The Flsun V400 does not use configuration files from other printers for cutting in order to avoid unpredictable situations.
- The printer was installed and tested before leaving the factory. It is normal if the printer has been used.
2.Technical data
| Model | Flsun V400 |
| Print size | Φ300*410mm(Highest point) |
| Moulding technology | FDM |
| Nozzle diameter | 0.4mm |
| Layer height | 0.05-0.3mm |
| Precision | ±0.15mm |
| Nozzle type | Single nozzle |
| Ambient temperature | 5-40°C |
| Nozzle temperature | ≤300°C |
| Print bed temperature | ≤110℃ |
| Supported filament | PLA/PLA+/ABS/PETG/WOOD/TPU/PC/NYLON(Need dried) |
| Print speed | 400mm/s |
| File format | STL/OBJ/AMF/3DS |
| Slice Software | Cura(recommend)/Simplify3D/prusaslicer/ideamaker |
| File format | G-code/UFP(Previewable model) |
| Working mode | Website/Flsun Speeder Pad |
| Data transmission | WIFI/U disc |
| Tension | Input:AC 115V-230V Output:DC 24 V |
| Electricity | 450W |
| Levelling type | Auto-level |
| Filament detection | Yes |
| Extruder type | Direct extruder |
| System | Flsun system 1.0 |
3.Scope of delivery
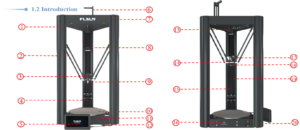
| ①Axes | ②Arms | ③Extruder cover | ④Belt adjusting nut | ⑤PAD |
| ⑥Filament holder | ⑦Upper housing | ⑧Linear unit | ⑨Nozzle kit | ⑩PEI |
| ⑪Lower housing | ⑫PAD power cable | ⑬Filament detector | ⑭LED | ⑮Linear unitary line |
| ⑯Change voltage | ⑰Direct drive | ⑱Cooling of components | ⑲Belt | ⑳Mains switch |
4.1.Print bed settings
- Click on "Settings>Print bed levelling>Height adjustment>Continue", please confirm that you are using the levelling module before levelling. After completing the first levelling, the printer will restart and display the homepage. The data will be saved automatically.
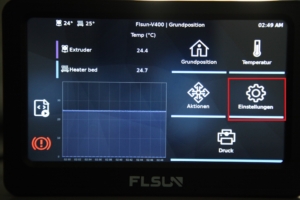
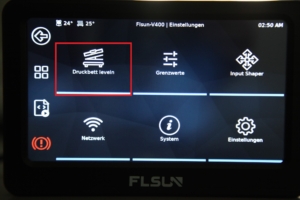
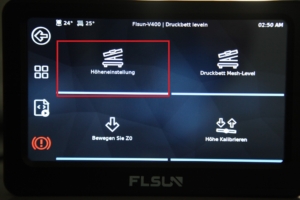
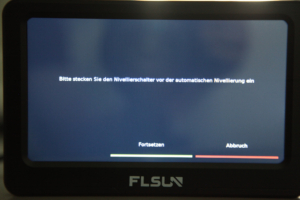
- Then click on "Settings>Levelling pressure bed>Bed>Continue" for the bed grid, the data will be saved automatically.


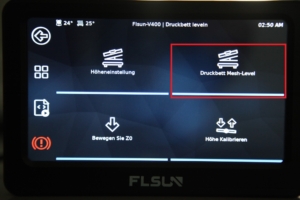
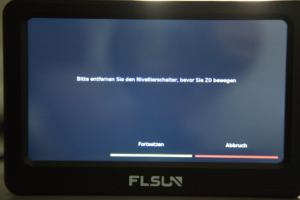
- Remove the levelling switch and disconnect the connection after you have levelled the bed net and click on "Settings>Levelling print bed>Move ZO>Continue".


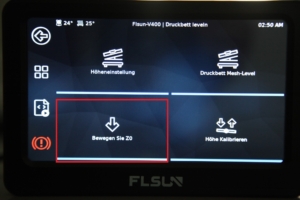

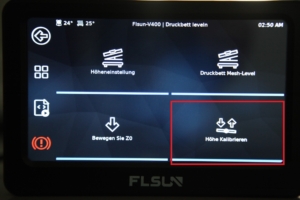
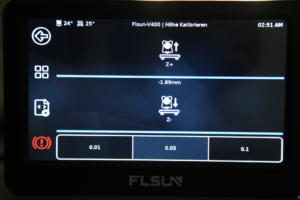
- Take a piece of A4 paper and place it under the nozzle, click on "Z-calibration" and use "Z+" or "Z-" to set the height of the nozzle. As soon as the sheet can be pulled away with slight resistance, the optimum distance has been reached. Now you can click on the "Back" button and then press the "Home" button.


4.2.Loading the filament
After replacing the different filament types, please extrude an additional 1 metre of filament to extrude it completely and remove the remaining filament.
- Use diagonal pliers to cut the thread at an angle of 45°.

- Feed the filament through the upper part of the printer.

- Feed the filament into the extruder

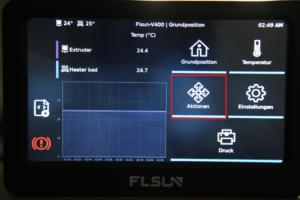
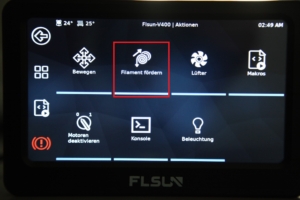
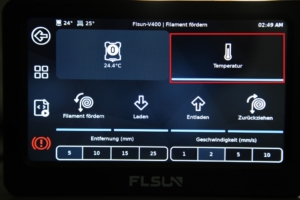
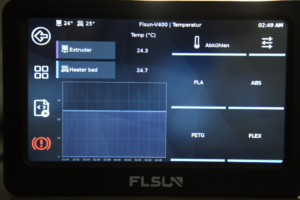
- Click on "Actions > Feed filament > Temperature". You can now set a nozzle temperature of 180°C and return to extruding. Press the filament down while clicking on "Extrude or Load" to load the filament.

