How to transfer your milling file to the milling machine via a USB stick.
Error description
You want to create a milling file in CAD and transfer it to the milling machine using a data carrier rather than via the network.
Troubleshooting
To transfer the file to the milling machine, you need to know two folders.
- The folder in which the file created in CAD is saved.
- The folder in which the milling machine searches for the file.
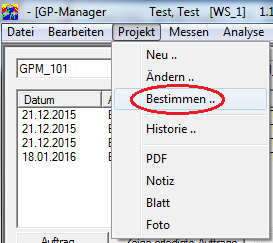
- Open the GP Manager where you created the insert with CAD. Select the customer for whom you want to create a CAD file via "Project“ -> „Determine ...„.

- Select a CAD model in the project view by double-clicking on it, or start the CAD module via "Analysis“ -> „CAD„
- Click on "Milling".

- Start the GP tiller module via "Analysis“ -> „GP milling machine„
- Above you can see the folders in which GP CAD saves the milling file and the folder in which the finished milling file is saved.
- Select the model you want to mill from the job list.
- Click on "Create milling file", the milling file should now be stored in the output folder. You can copy this to a data carrier and transfer it to the milling machine.

The second folder you need to know is the folder in which the milling machine searches for the milling file. How you find this folder depends on the milling machine. Copy the file from the data carrier to the corresponding folder on the milling machine.