How can I mould a last higher for a claw toe?
Error description
You want to change a last because your customer has a claw toe. This means that the last must be modelled at the site of the claw toe.
Troubleshooting
- Start the GP Manager and select a customer.
- Open OptiCAD
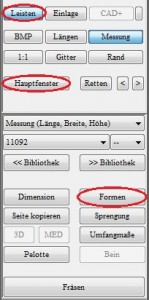
- Select the moulding you want to modify, make sure that Mouldings is selected. Then select in the main window "Moulds„

- In the main window, click on "Surface„

- Set the centre point (the highest point of the hammer toe) with CTRL + left mouse button. The green dot should then be at the corresponding position.

- Hold down the left mouse button and drag a frame around the centre point in the size of the shape to be modelled.

- You can reset both the frame and the centre point at any time. All changes remain in place.
- Switch to view A (outside) or I (inside)

- You can model the shape using the o/u (up/down), i/a (inside/outside) and v/h (front/back) buttons. Each time you press the button, the shape is extended 1 mm in the corresponding direction.

- To judge the shape, change the view frequently or rotate the model with the mouse to get a spatial idea of the result.