GP branch
From version 7.3
GP Filale orders can now only be deleted via the order list. The order must be searched for via the status and can then be removed by right-clicking and deleting the order.
Up to version 7.2:
Orders that have been created cannot be deleted in the BP Branch module. Once an order has been ordered, it can no longer be changed.
There are two ways to delete an order:
1. open GP Manager, load customers, open GP control and click top right
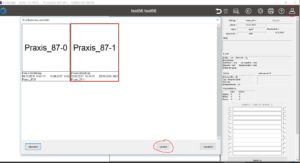
2. open GP Manager, open GP order list, select order, right-click, delete order completely
from version 7.3
All settings for the shoes can be found here: ..GpSystem\SKIN\GPManager\SKIN_TP_FILIALE\INLOCATIONS\SHOES
The images of the shoes must be stored in the folder GpSystem\SKIN\GPManager\SKIN_TP_FILIALS\INSTORES\SHOE\SHOE TYPE. The reference to the images and the shoe selection is then specified here: GpSystem\SKIN\GPManager\SKIN_TP_FILIALE\INLOCATIONS\SHOE\Shoe types.INI
The entries for shoe size and insole width can be found here: Shoe-size.INI and Insole-width.INI
up to version 7.3
Please open the praxis.ini in the following folder:
\GPM_V7\GPSystem\GpSystem_Branch...
[SHOE TYPES]
I_Preselection = 2
B_Use_MINIICON = FALSE
I_DimBMP = 100
T_1 = Slippers/pumps
T_2 = Comfort shoe
T_3 = Finn Comfort
T_4 = SportShoes
T_5 = Work shoe
T_6 = Safety shoes ESD
FILE_1 = pumps
FILE_2 = convenient
FILE_3 = finn
FILE_4 = sport
FILE_5 = Labour
FILE_6 = antistatic
T_1 can be used to define a name for a shoe. If an image is also to appear for this name, the reference to an image file must be stored via File_1. The corresponding image must be stored here as a jpg file:
\GPM_V7\GPSystem\BMP\Shoe type
The dimensions of the file must be square. e.g.: 100 Px * 100Px
Larger than 200*200 is not worthwhile, as the image is only displayed very small anyway.
You can see which file is responsible for the scan settings in the ;
GP_TC_2DScan.ini
[MESSEN]
B_rotateFScan180 = no //the measurement is rotated by 180 degrees
FILE_TWAIN = Config_TWAIN_Filiale //further scan settings
Config_TWAIN_Branch
[TWAIN]
T_Scanner = Microtek ScanWizard DI //Name of the scanner from the scanner list
B_Select = yes //if the specified scanner name is not found, a selection dialogue appears
B_Unbedingt_Dialog_Aufrufen = yes //yes= a scan dialogue is displayed before the scan
B_Erzeuge_ScannerListe = yes //Creates a scanner list in C:\Temp\GpTemp > TWAIN_Liste.txt
B_Create_TWAIN_Property_list = no
If scans are displayed rotated or mirrored, they can be rotated by 180 degrees in praxis.ini or adjusted via the scanner software (B_Unbedingt_Dialog_Aufrufen = yes).
from version 7.3:
The collection date is automatically extended by 7 working days. This number can be changed here:
GPM_V7\GPSystem\GpSystem_Branch
GP_TP_FILIALE.ini
[EXTRAS]
I_DiffDays = 7
before version 7.3:
The collection date is automatically extended by 7 working days. This number can be changed here:
GPM_V7\GPSystem\GpSystem_Branch
practice.ini
[EXTRAS]
I_DiffDays = 7
The selection of employees can be created separately for each profile or each individual workstation. The settings for this can be found in the
GPM_V7\GPSystem\GPSystem_Filiale_xyz\Praxis.ini and from version 7.3 in GP_TP_FILIALE.ini
[EDITOR]
i_anz = 2 // Number must match the number of editors
B_AUTOEDITLIST = yes //yes = list is automatically created and dynamically expanded > every new employee is saved - no = only one of the stored employees can be selected
T_BEARBEITER_1 = Name or abbreviation of the employee
T_PROCESSOR_2 = MK
...
from version 7.3
All settings can be edited via the files in the following folder:
GpSystem\SKIN\GPManager\SKIN_TP_FILIALE\INPUTS\SHOES
Please make sure that the shoe images are not too large so that the page loading time remains short.
Version 6 - 7.3
To edit the selection, please open the praxis.ini in the following directory:
\GPM_V7\GPSystem\GpSystem_Branch...
[SHOE SIZES]
I_Preselection = 0 // if the number 2 is shown here, size 27 is preselected
T_1 = 26
T_2 = 27
T_3 = 28
T_4 = 29
...
Everything that is displayed as T_... is later in the selection
From version 7.3, the order of the individual discs in the GP shop can be changed.
Fixed are start page (window_1), customer page (window_2), print (window_14) and order (window_15). All other pages can be arranged individually in the following ini:
GP_TP_Branch.ini
[MODULE_WINDOW_FLOW]
MODULE_WINDOW_1 = BRANCH_HOME
MODULE_WINDOW_2 = BRANCH_ORDER
MODULE_WINDOW_3 = PHOTO_RECIPE
MODULE_WINDOW_4 = 3DSCAN_3DSCANF
MODULE_WINDOW_5 = PHOTO_VIDEO
MODULE_WINDOW_6 = DV_MULTISENS
MODULE_WINDOW_7 = DV_BALANCE
MODULE_WINDOW_8 = 2DSCAN_FUSSSCAN
MODULE_WINDOW_9 = 2DSCAN_TRITTSCAN
MODULE_WINDOW_10 = PHOTO_PHOTOS
MODULE_WINDOW_11 = INSERT_ARTICLE
MODULE_WINDOW_12 = INSOLE_SHOES
MODULE_WINDOW_13 = BRANCH_EXTRAS
MODULE_WINDOW_14 = PRINT_BRANCH
MODULE_WINDOW_15 = SEND_BRANCH
We recommend assigning a separate prefix to each branch with a separate database so that customer numbers are not assigned twice. The settings can be found here:
GPM_V7\GpSystem\GpSystem_Single_user\Gpman.ini
[Database]
T_Prefix = ihr_Prefix //The GP Manager automatically increments the numbers after the text
Images can be stored or changed via the deposit editor in the GP shop.
The software generates an additional preview image for each inserted image.
If the changed image is not displayed, the old preview image has not been deleted. To rectify the error and delete the old preview image, you must go to the corresponding folder:
Inlays + additives = GpSystem\BMP\PRAXIS
References = GpSystem\BMP\PRAXIS\REFERENCE
Material = GpSystem\BMP\Practice\Material
Remove the corresponding preview image. Preview images are distinguished by the attachment in the file name.
Example:
08.99.99.0008.bmp is the original and 08.99.99.0008_64.bmp is the preview image
The fixed amounts are stored in the hmv.ini file with gross prices.
It is located in: GPSystem\INI\hmv.ini
The prices can be customised or replaced by the current version.
Prices for a VAT rate of 5 % can be found in HMV_2020_5_Prozent_MwSt.ini and can replace the existing prices in hmv.ini via copy and paste. The calculated prices should be adjusted accordingly.
The current version can be found in our download folder under Downloads\Software\GPFiliale: [wpfilebase tag=browser id=232 /]
h4 { line-height:1.2; }
To use mail dispatch, you need a sender and a recipient. Normally, the sender is the branch and the recipient is the head office. The same e-mail can be used for both locations.
FILILE
Enter the shipping address:
Enter the recipient:
C:\GPM_V7\GPSystem\GpSystem_your_branch\practice.ini
[EMAIL_ORDER]
b_SendImmediately = yes
T_TO = praxis@go-tec.de //Address to which the mails from the branch are sent
T_CC =
T_BCC =
T_SUBJECT = PRAXIS //only mails with this subject are loaded
CENTRE


