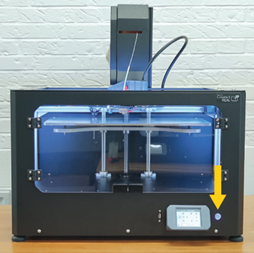
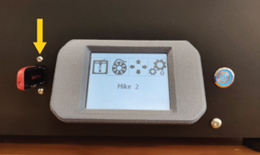
This is the manual for the Mike2 inlay 3D printer. The print head of the Mike 1+ is identical in construction to the Mike2

A USB stick is required to update the firmware. Transfer the update files provided by GeBioM to the root folder of a USB stick, disconnect the USB stick and then carry out the following steps:

1  

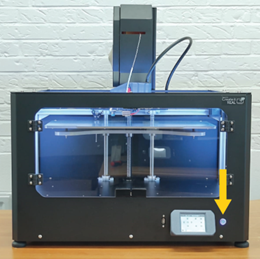
Switch on the printer.


2


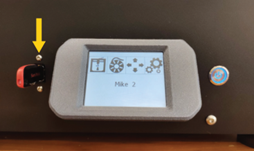
Connect the USB stick to the printer.
Important: The USB flash drive must be a FAT32 file format.


3


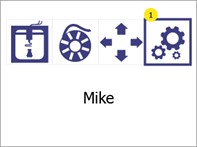
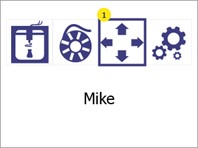
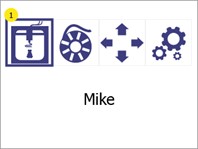
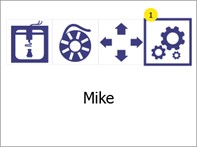
Open the menu Settings (1).


4


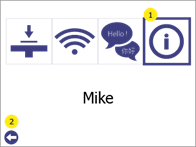
Go to the menu Printer information and firmware update (1).


Press the Back button (2) to return to the main menu.


5


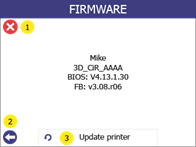
Select Update printer (3).


Press the Back button (2) or Cancel (1) to return to the main menu


6


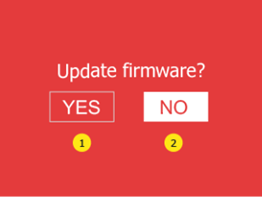
Click "Yes" (1) twice to confirm this.


Press "No" (2) to return to the main menu.


7


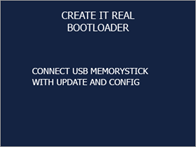
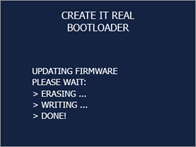
Wait until the update is installed.


8


Allow the printer to start, without the USB stick from the printer to remove.


9


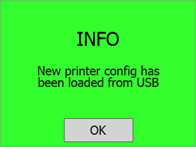
Wait until a green
screen with confirmation of the successful update or an ok button is displayed. Some update procedures can take up to one minute.

 
System information about the printer can be found in the information menu. This is usually used for customer support.


1

Open the menu Settingsby pressing the settings button (1).
 

2

Open the menu Printer information and firmware updateby pressing the information button (1).

Press the Back button (2) to return to the main menu.


3

The following can be seen on the information screen (1):- The printer model

- The unique name of the printer.

- BIOS version of the printer.

- Printer firmware version.


Press the Back button (2) to return to the Settings to return.


If required, it is possible to control the movement and heating of the printer manually.

1  

Open the menu Manual controlby pressing the manual control button (1).


2


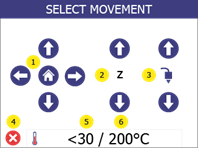
Use the arrows (1) to move the print head in the working area.


Press the home button in the centre (1) to move all axes to their "home" position (zero).


Move the print bed up and down using the Z-axis arrows (2).


Extrude or retract the filament using the print head control arrows (3). (Note that these buttons are disabled when the print head temperature (5) is lower than the target temperature (6))


Start manual heating with the

temperatures (5 and 6). When manual heating is started (the printer maintains or reaches a certain temperature), the button
a red border. If no manual heating is activated, the border is green.


3


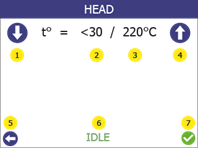
Set the target temperature by pressing the down arrow (1) and the up arrow (4).


To confirm the target temperature and start heating, press the confirmation button (7).


The status of the heating controller is shown on the display (6), which shows IDLE when not heating and HEATING when heating.

In addition, the lighting in the printer is white when the heating control is switched off and purple when the control is switched on.


To stop heating, either go back to the main menu or reduce the target temperature (3) below 30 °C. oC ("-" is displayed) and click on Confirm (7)


Press the Back button (5) to return to the Manual control to return.

Press the Back button (5) again to go to the main menu.


The pause menu can be accessed at any time during printing.


1

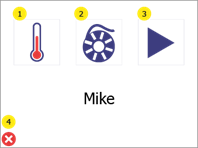
During printing, access the menu Break by pressing the pause button (1).  


2


It is possible from the pause menu:

- Adjust the temperature (1).

- To change the filament (2), see chapter 7.

- Continue printing (3).


To cancel the printing process, press the cancel button (4).


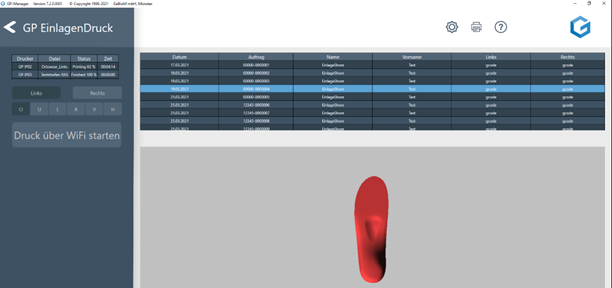
Printing via WLAN is started directly from the GP Inlay Print module in the GP Manager and the file is automatically transferred to the printer's internal memory.


1


Open the GP Inlay Print module and select the relevant job from the job list. Select a page. Check whether a printer in the printer list on the left-hand side is idle (IDLE). Make sure that the printer is prepared for printing. See chapter 10.

Start printing using the button Start printing via WiFi.

The printer indicates that printing is being started via Wi-Fi.


2


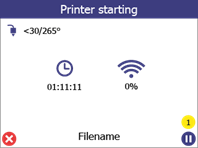
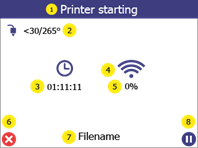
The print preview screen shows the status of the print process during printing:

(1) indicates whether the printer is currently heating or printing.

(2) displays the current and target temperature.

(3) shows the remaining time of the print job to be completed.

(4) indicates whether printing has been started via WiFi.

(5) shows the progress of printing in %.

(7) displays the file name of the object to be printed.


To pause printing, press the pause button (8). Further information can be found in section 11.3.


To cancel the printing process, press the cancel button (6).


If the service allows it, the printer can print directly from a USB flash drive.


1

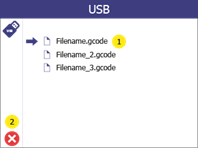
Open the menu Print USBby pressing the Print button (1).
 

2

A list of all available print files is displayed (1). The arrow indicates which file is currently selected. To select a file, press it (if not already selected) and then press it again to confirm the selection. 

Press the Back button (2) to return to the main menu.


3

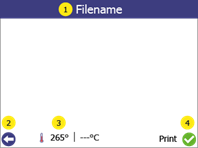
On the print preview screen, it is possible to display the file name of the selected file (1) and if a temperature other than the one set in the print file is required, it can be changed by pressing the temperature (3).


To start printing, press the "Next" button (4).


Press the Back button (2) to go back one step.


4


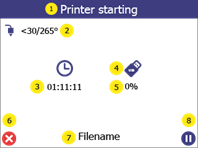
The print preview screen shows the status of the print process during printing:

(1) shows the status of the printer.

(2) shows the current and target temperature.

(3) shows the remaining time of the print job to be completed.

(4) indicates whether the printer is reading the print file from USB. If this is the case, do not remove the USB flash drive from the printer as this will end the print job.

(5) shows the progress of printing in %.

(7) displays the file name of the object to be printed.


To pause printing, press the pause button (8). For more information, see section 11.3.


To cancel the printing process, press the cancel button (6).

Before you start printing, a few things need to be checked.

  • The print area is located on the print bed.
  • The Print bed is empty.
    Make sure that there is nothing on the print area (e.g. another printed object).
  • The print bed is clean.
    If the printing surface is dirty (dust, grease, etc.), the extruded material will not adhere to the surface. Check that the surface is clean. Further information can be found in section 14.1.
  • Enough filament
    Open the filament chamber and make sure that there is enough filament on the spool.
  • Clean nozzle
    Material may stick to the nozzle of the print head from previous use. If this is the case, remove it with tweezers or the cleaning tool. Further information can be found in section 14.2

After the configuration file "wifi_config.cir" generated, place it in the root folder of an empty USB flash drive and carry out the following steps:

1  

Switch on the printer


2


Connect the USB stick to the printer.
Important: The USB flash drive must be a FAT32 file format.


3


Open the menu Settings (1).


4  


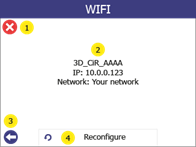
Select Wi-Fi configuration (1) from


Press the Back button (2) to return to the main menu.


5


Select Reconfigure (4)


Display of the configuration of the printer in the network in (2).

Press the cancel button (1) or the back button (2) to return to the main menu.


6


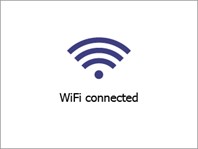
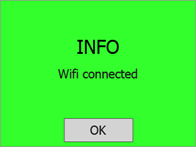
If successful, the confirmation message "Wi-Fi connected" will be displayed on the screen. At this point, the printer will be connected to the selected network and the printer name will be displayed on the printer's LCD screen.