| Performance requirements | 230V AC 50 Hz (1.5A);
120V AC 60 Hz (3A) |
| Power consumption | Normal operation: < 100W
Idle mode: < 50W Stand-by: < 40W |
| Operating room temperature | 5-35 °C (40-95 °F) |
| Print head temperature | Operation: 240-260 °C (464-500 °F);
Maximum: 285 °C (545 °F) |
| Filament chamber temperature | Operation: 35-45 °C (95-113 °F)
Maximum: 80 °C (176 °F) |
| Size of the printer workspace
(Largest printable object) |
W / D / H
39 / 14.5 / 14.5 cm (15.4 / 5.7 / 5.7 inches) |
| Printer size
(cable and filament chamber installed) |
W / D / H
67 / 54 / 75 cm (26.4 / 21.5 / 29.5 inches) |
| Printer weight | 37.5 kg (86 lbs) |
This is the manual for the Mike2 inlay 3D printer. The print head of the Mike 1+ is identical in construction to the Mike2
Below you will find all error messages where you can take action yourself. For all other error messages, please contact our support (cubix@gebiom.com).
| Error | Cause | Solution | |
| ERROR 211: USB removed | USB stick was disconnected during the print job. | Make sure that the USB stick has not been removed during the printing process.
If the error occurs and the USB stick is still in the printer, 1. check your USB stick. 2. use a different USB stick. |
|
| ERROR 212: File not found | The printer is trying to resume a paused print, but the file cannot be found on the USB stick. | Restart the print job. | |
| ERROR 213: USB Power Fault | The USB stick used draws too much power and has been disconnected so as not to damage the printer electronics. | Remove the USB stick; then click OK and try another USB stick. | |
| ERROR 410: Setup file not found | During setup, the printer cannot find the file in the root directory of the USB stick or cannot open/read it. | 1. make sure that the file wifi_config.cir is located in the root directory of the USB stick.
2. make sure that the file wifi_config.cir is not write-protected. |
|
| ERROR 411: Wifi connection impossible | WiFi connection timeout (probably because the router is not responding to the printer). | 1. try to establish a connection again.
2. make sure that the WiFi router is working properly. 3. make sure that the firewall is not blocking the IP address of the printer. |
|
| ERROR 412: Wifi connection impossible | The password you entered is incorrect. | Make sure that the USB stick contains the file wifi_config.cir with the correct password for the selected network. | |
| ERROR 413: Wifi connection impossible | The printer cannot find the network. | 1. make sure that the USB stick contains the file wifi_config.cir with the correct network name.
2. make sure that the WiFi router is working properly. 3. make sure that the firewall is not blocking the IP address of the printer. |
|
| ERROR 417: Wifi connection lost | Wifi connection lost (timeout) | 1. restart the Wifi transmission
2. check that the WiFi router is working properly. 3. try moving the printer closer to the router. |
|
| ERROR 520: Newer slicer required | The version of the slicer that generated the file is old and is not supported by the current firmware | Make sure that you are using the latest version of the slicer. | |
| Other errors | An error has been detected that requires maintenance. | Try restarting the printer.
If the problem persists, contact support (cubix@gebiom.com) and inform them of the error code. |
In some cases, the filament can get stuck in the sprockets. If the regular filament change does not help, proceed as follows:
| 1 |
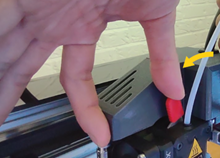
Turn the lever to idle / position 0 (anti-clockwise). |
|
|
2 |
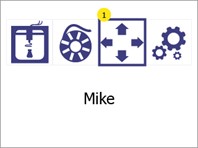
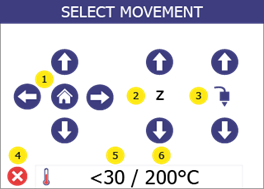
Open the menu Manual controlby pressing the manual control button (1). |
|
|
3 |
Start manual heating with the Temperatures (5 and 6).
|
 |
|
4 |
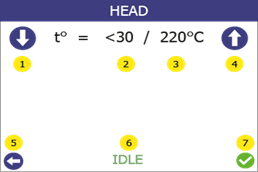
Use the arrow buttons (1 and 4) to set the target temperature to 265°C and press Confirm (7) Then go back to the menu Manual controlby pressing "Back" (5).
|
 |
|
5 |
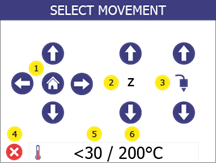
Press and hold the up arrow of the extruder (3) for 5 seconds while pulling. Then press and hold the down arrow of the extruder (3) while continuing to pull. The filament should come out after 5-10 seconds.
|
 |
|
6 |
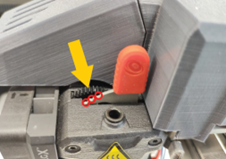
Cut off the deformed piece of filament. Set the lever back to position "3".
Call up the menu Filament change and follow the instructions to insert the filament. |
 |
If the filament comes out but clogs again after another print attempt, clean the print head.
If the solution does not help and the filament is still stuck, contact cubix@gebiom.com.
- The filament was empty before printing could be completed. Check whether the filament needs to be replaced.
- Printer firmware error. Check the printer screen for error messages. If the error message is not self-explanatory, contact support.
- During the printing process, there was something in the work area that was blocking the printer. Check the work area for foreign objects.
- The silicone sleeve of the print head has fallen off and is blocking the printer. Check that the red silicone sleeve is correctly attached to the print head. Make sure that the silicone sleeve is not cracked.
- The power supply to the printer was interrupted during the printing process. Check whether the printer is switched on.
- The print bed is too close to the print head during the first printed layer. Calibrate the height by following the print bed calibration (see chapter 8).
- The printer has run out of filament.
- The filament has become entangled in the filament chamber. Check the filament in the filament chamber.
- The filament is stuck in the print head. Use the filament replacement procedure (see chapter 7) to remove the filament, cut off a piece and reinsert it.
- The print head is clogged and the print head needs to be cleaned. Carry out a cleaning process (see section 2).
- The printed part has a rough surface with small bubbles. This can happen if the filament is damp because the filament chamber is OFF or it has been stored in an uncontrolled environment.
- Check whether the filament chamber is connected.
- Replace the filament with a filament that has been stored in a dry and warm environment.
- Leave the wet filament in the (heated) filament chamber for at least one day without printing to dry it.
- The print surface is not clean. Wipe the print surface with isopropyl alcohol (see chapter 14).
- The print height is incorrect. Calibrate the height by following the print bed calibration (see chapter 8).
Each problem is shown with possible causes and their solution. Go through the list in the order shown. If a problem cannot be solved, contact support.
Cleaning the print head is an important process that contributes to the quality of the printed objects. It reduces the risk of clogging and ensures even extrusion of the filament.
Cleaning the nozzle from the outside
- We recommend that the outer tip of the print head (the nozzle) daily with the cleaning tool included in the accessory box.
Allow the print head to cool down first. Scrape the nozzle with the cleaning tool until the tip is free of filament residue. Make sure that you do not touch the inductive sensor (blue dot) behind the nozzle when cleaning it.
Cleaning the inside of the nozzle
- We recommend cleaning the inside of the nozzle every time a new filament spool is loaded. Only use approved cleaning filament for this process.
Proceed as follows:
| 1 |
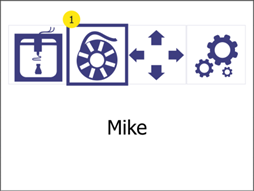
Open the menu Filament changeby pressing the settings button (1). |
|
|
|
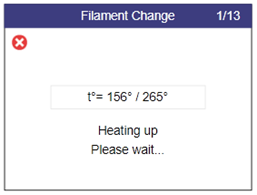
2 |
Heating up. Please wait until the target temperature has been reached. |
|
|
|
3 |
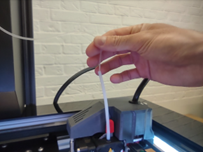
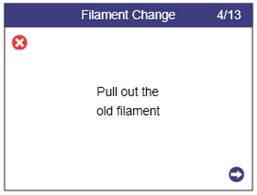
Pull the old filament out of the extruder and press the WfurtherButton (2). |
 |
 |
|
4 |
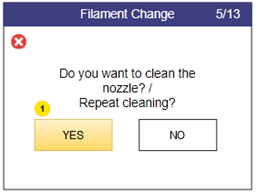
Select Yes (1).
|
|
|
|
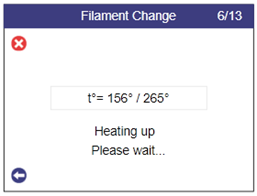
5 |
Heating up. Please wait until the target temperature has been reached. |
 |
|
|
6 |
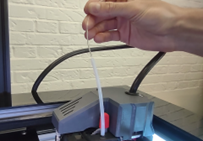
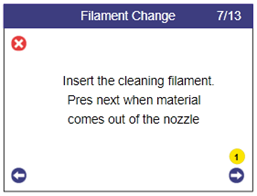
Feed the cleaning filament into the extruder. When the filament comes out of the nozzle, press the Further-button (2) |
 |
 |
|
7 |
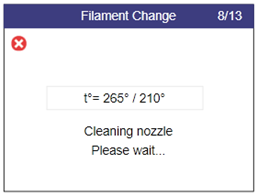
In this automatic step, the temperature begins to drop as the material is extruded.
Note: You may hear a clicking sound. This is normal. |
 |
|
|
8 |
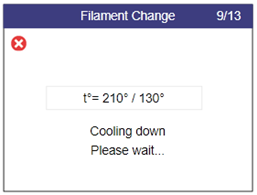
In this automatic step, the extrusion is switched off and the print head is cooled down. |
|
|
|
9 |
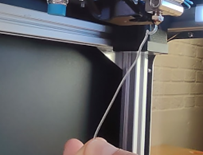
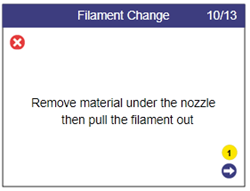
Remove the extruded filament from under the nozzle. |
 |
|
|
10 |
Turn the lever to idle / position 0 (anti-clockwise). |
 |
|
| 11 | Grasp the cleaning filament and pull it out of the extruder. | 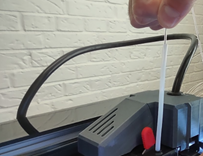 |
 |
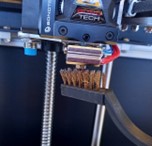
| 12 | Clean any burnt residue from the nozzle using the brush supplied.
Attention! The nozzle temperature is 110 degrees! |
 |
|
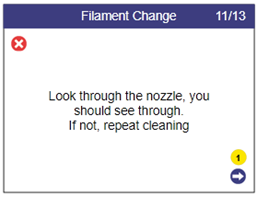
| 13 | Look through the nozzle. You should be able to see through the hole. | 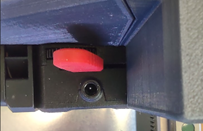 |
 |
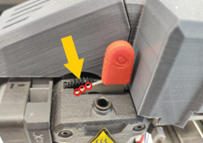
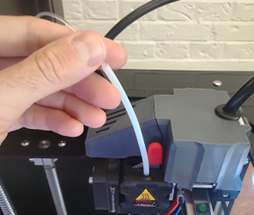
| 14 | Turn the lever clockwise to position 3 and then insert new filament.
|
 |
 |
| 15 | Wait until the print head has heated up.
|
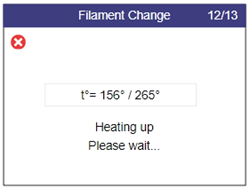 |
|
| 16 | Insert the regular filament and when the material comes out of the nozzle, press the confirmation button (1) to complete the process. | 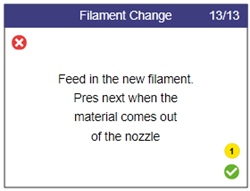 |
Each print leaves some oil residue from the printed material, which over time will cause printed objects to adhere less to the surface. It is recommended to clean the print surface thoroughly with isopropyl alcohol before each print to remove any oil residue (see chapter 10).
To ensure that the printer continues to print as expected, regular cleaning is recommended. Both the print bed and the print head must be cleaned.
