Before you can also address your printer via Wi-Fi, it must first be configured.

NOTE: To use the module GP EinlagenDruck, the following application must be installed on the computer: Microsoft .NET Core Runtime 3.1.16 (x86). If you do not have this program installed, please contact support.

The Bed adjustment menu gives the possibility to fine tune the bed levelling of the printer in order to achieve better adhesion (sticking) of the extruded material to the printing surface.

OBS: Before starting this procedure, make sure that the print head temperature is below 80 oC and the nozzle is clean (see Section 14)

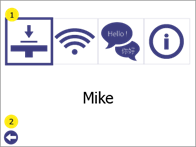
1 Enter the Settings menu by pressing the settings button (1).


2

 Enter in the Bed levelling menu (1)

Press Back (2) to go back to main menu.


3

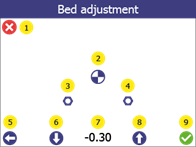
 Enter in Bed adjustment menu (1).

WARNING! When you press on (1), the printer will start moving. Make sure that there is no objects or body parts inside the printing chamber.

Press Back (2) to go back to Settings menu.


4


1.    Press on the “Reference point” button (2).
Printer head will move to the reference point, will do a measurement and then print head and bed will move to “zero” position.

The offset value (7) for Mike should

be between –0.4 and – 1.2.

If the measured value is outside this         range, please contact Customer                 Support before proceeding.

(Note: (3) & (4) are levelling points, used during Service procedure )

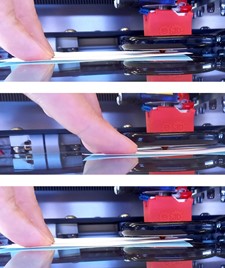
2.    Take a piece of paper (for regular printer, from notebook, etc) and try to fit between the print head and the printing surface without using force.

3.    If paper cannot fit in (distance is too short), press the Down arrow (6) to move the bed down until the paper can fit in.
WARNING! Do not apply force with your hand to the bed, during this procedure.

4.    With the paper between the head and the printing surface, do the fine tuning. Move the paper slightly back and forth while bringing the bed up one step at a time using the Up arrow (8) (each step is 0.05mm).
Stop the operation when you feel that the paper cannot move smoothly anymore.

5.    Press Down arrow (6) once.

6.    Confirm the adjustment by clicking OK (9).

Click Home (1) or Back (5) to cancel everything (no changes will be saved)


After this operation, perform a test print (see section 8.2) to confirm that the levelling was successful.


Checking whether the bed is properly levelled can be done by performing a test print. To do that:

1 Enter the Settings menu by pressing the settings button (1).


2

Enter in the Bed levelling menu (1)

Press Back (2) to go back to main menu.


3

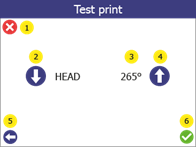
Enter in Test print menu (1)

Press Back (2) to go back to Settings menu.


4


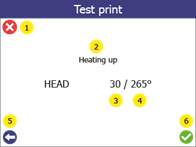
Choose the printing temperature of the print head for the test print.

Change the target temperature (3) of the test print up (4) or down (2)

If you are using the default filament Addigy® FPU 79AR8, 265 oC is correct value. Press the confirm button (6) to start.

Press Cancel (1) to go in the main menu

Press Back (5) to go back to Bed levelling menu


5

When test print starts, the screen will show the status of the printer (2), the current temperature (3) and the target temperature (4).

Press Cancel (1) to stop the print and get back in Main menu

Press Back (5) to stop the print and go back one menu.


6

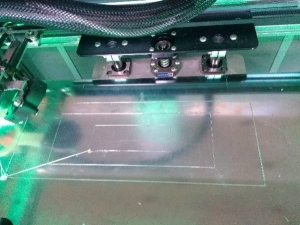
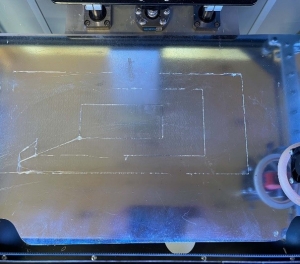
Test print successful

–          3 connected rectangles with evenly extruded lines.

–          Extruded filament is clear and see through.


Test print failed

–          Uneven extrusion

–          Large parts with no extrusion

–          Material stuck to the print head instead of the bed.


If the test print fail, do the levelling adjustment (see below)


It is an essential requirement of the 3D printing process that the print head is always at a constant distance from the printing surface (print bed) while printing the bottom of the object.

If the distance is too big, the extruded material will not stick to the printing surface and will be dragged around by the head.

If the distance is too small (or the head and bed are touching), material will not come out of the head, which may result in clogging (the material will get stuck inside the head and additional maintenance will be required to bring the printer back in operating conditions)

The 3D printer Mike features an algorithm for correcting imperfections in the bed level. However, sometimes the reference height (starting point) parameter is required to be adjusted with the help of the user.

The filament change procedure always runs in 2 stages – Remove old filament and Install new filament. In case the filament is loaded for the first time (there is no filament to remove), just go through the procedure as if there is already installed filament.

1  

Enter the filament change menu by pressing the filament change button (1)


2

REMOVING THE OLD FILAMENT

Select the melting temperature of the installed filament (2) using the up and down arrows.

For the filament Addigy® FPU 79AR8 this temperature is 250-265°C.

Press the „next” button (4) to go to the next step.

To abort the procedure, press the cancel button (1).

Press the back button (3) to go back to the settings menu.


3


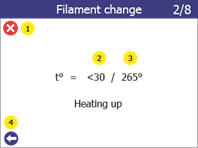
The printer will begin to heat up the printhead to the selected target temperature.

The procedure will automatically continue once target temperature have been reached

During heat up both the current temperature (2) and the target temperature (3) is shown.

To abort the procedure, press the cancel button (1).

Press the back button (4) to go one step back.


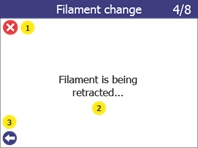
4 When target temperature is reached, the printer will start to unload the filament.

This starts with a small push-out of filament in step 3/8 to ensure that no old filament remains in the nozzle causing any blockage.

Once push-out is done it will start to retract the filament in step 4/8 remove it from the nozzle.

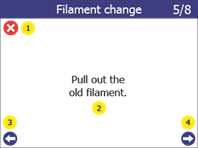
Once the filament has been retracted out of the extruder, it will continue to step 5/8. Pull the filament slowly out of the Teflon tube. It is now ready for removal of the filament spool, either for replacing for a new one, or for filament storage.

Press the continue button (4) to go to the next step.

During these steps, the current status of the procedure can be seen on the screen (2)

To abort the procedure, press the cancel button (1).

Use the back button (3) to go one step back.


5

INSTALLING THE NEW FILAMENT

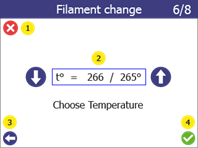
Select the melting temperature of the new filament (2).

For the filament Addigy® FPU 79AR8, this temperature is 250-265°C.

Press the Confirm button (4) to go to the next step.

To abort the procedure, press the cancel button (1).

Use the back button (3) to go one step back.


6


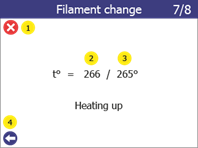
The printer will begin to heat up the printhead to the selected target temperature.

The procedure will automatically continue once target temperature have been reached.

During heat up both the current temperature (2) and the target temperature (3) are shown.

To abort the procedure, press the cancel button (1).

Press the back button (4) to go one step back.


7


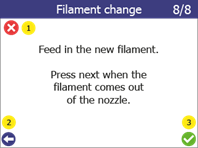
Once the printer has reached target temperature, it will automatically start and attempt to extrude.

To abort the procedure, press the cancel button (1).

Use the back button (2) to go one step back

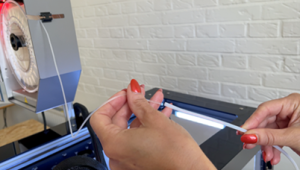
Insert the filament through the filament tube

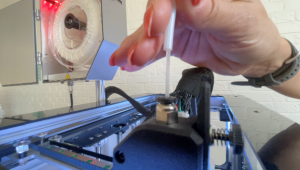
Push filament down until the print head grabs it. Then release the filament and look under the print head.

Once the print head begins to extrude filament with consistent shape and speed, press the Confirm button (3) on the LCD screen.

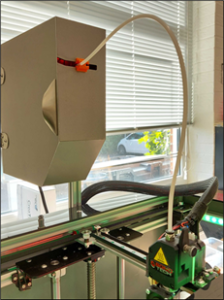
Fasten the filament tube into the print head and onto the filament chamber.

The filament change procedure is now complete.


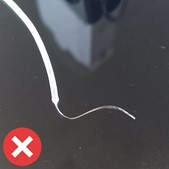
Before inserting the filament into the printhead, make sure that the end of the filament does not have any defects, as these can cause the filament to not load properly.

In case there is such, cut it with scissors, side cutters or another cutting tool.

To ensure that the extruder is ready for printing, the idle lever screw must tighten.

WARNING! Excessive force should not be applied when doing so, as this can damage the extruder itself.

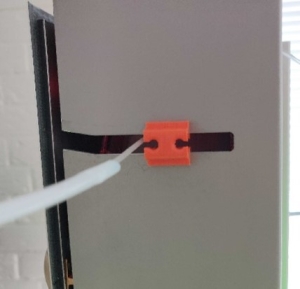
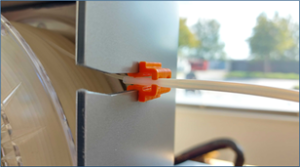
Insert the filament into the tube and attach the tube to the filament chamber via the connector mounted previously (see 4.13)

The tip of the tube should be about 2 mm ahead of the connector.

Make sure you don’t bend the tube in sharp angles, that would damage the tube and add unwanted friction to the filament.